
As a kid, animal crossing was one of my most played games. I have fond memories of my two younger sisters and I all huddling together with our Nintendo DSes and playing Animal Crossing: Wild World together. We would visit each other’s islands, design clothes, and catch bugs.
So when Animal Crossing: New Horizons came out on the Nintendo Switch, I knew I had to play this game and relive my childhood memories! It was a very exciting time for me (and still is), especially since the game came out around the beginning of Covid-19 lockdowns in the US. The game helped me find a way to escape from reality when everything else around me was changing.
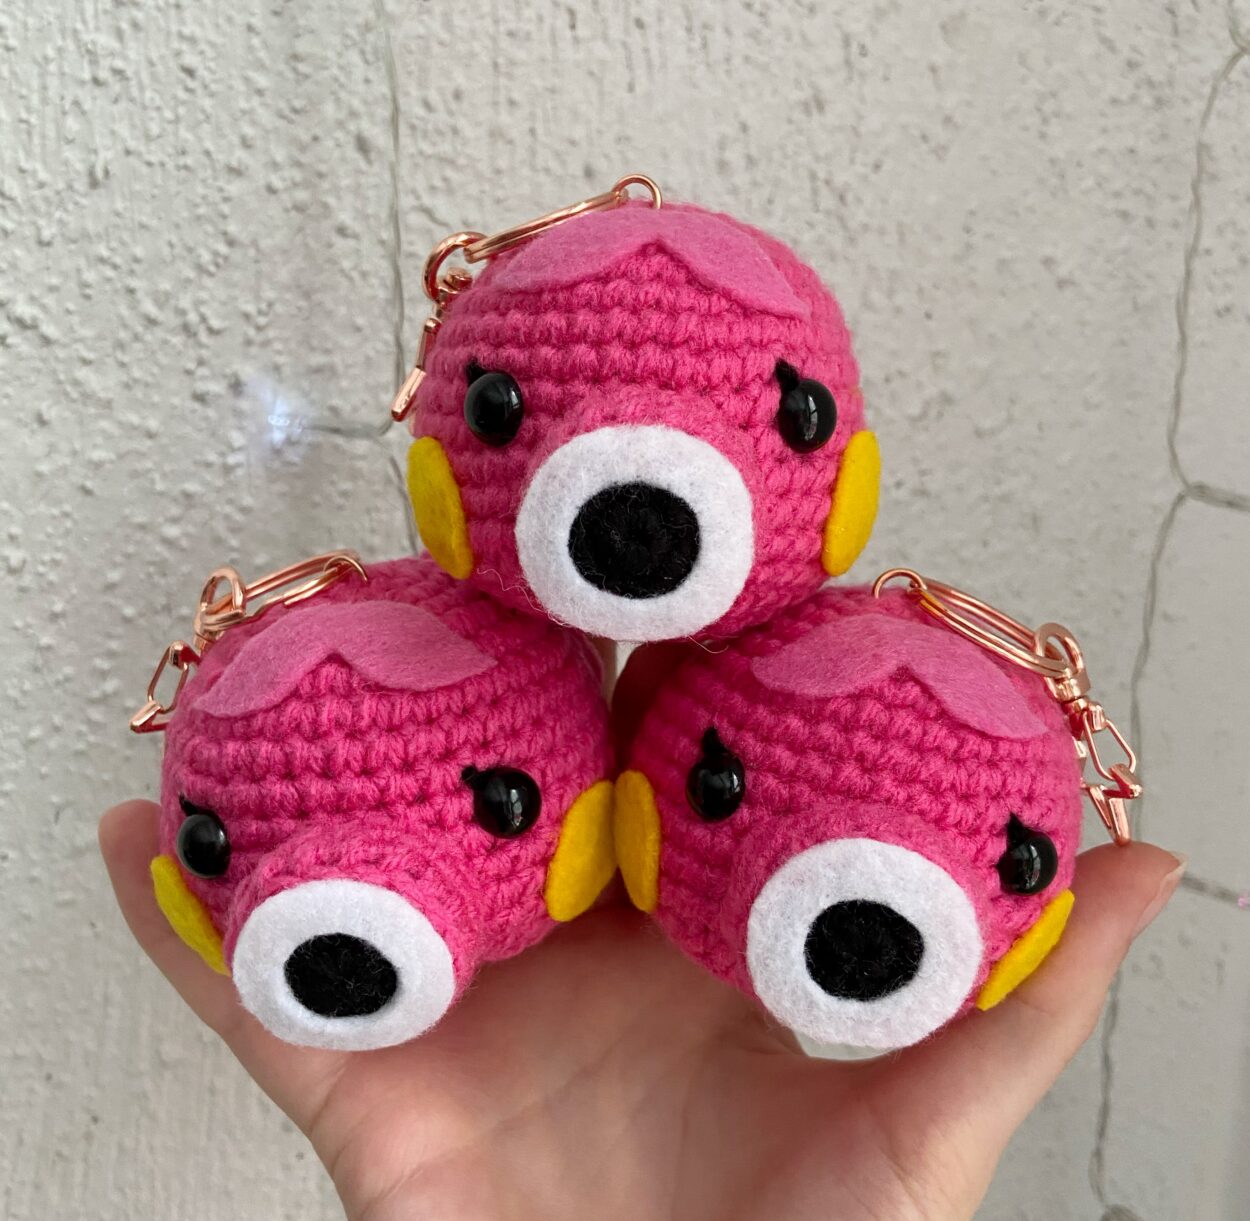
As part of this new game, I was introduced to new Animal Crossing villagers who, while they were a part of past Animal Crossing games, I hadn’t met them before. One of those villagers was Marina! Marina was the third villager I invited to my island and has quickly become one of my favorites! (Along with Zucker, of course!) I love Marina’s sweet personality, her love of books, and her cute, pastel clothes. In fact, I loved her so much that I decided to design an amigurumi Marina keychain so that I could carry her around with me wherever I go! Below, I have attached a video tutorial and written a pattern so that you can crochet your very own Marina keychain!
Materials
- Crochet hook, 3.25mm
- Scissors
- Yarn needle
- Felt (for the mouth, bow, and cheeks – in colors pink, yellow, white)
- 9mm Safety Eyes (you can also use black felt if you don’t have safety eyes)
- Fiber Fill/Stuffing
- Pink Yarn (I used the brand Loops and Threads Impeccable Yarn in the shade Lippy)
- Black Yarn (for the mouth and eyelashes)
- Hot Glue Gun & Glue (for glueing the felt mouth on, alternatively you can use a needle and some thread to secure the felt onto your keychain)
- Keychain of your choice (I use keychains from this Etsy supplier)
- 8mm Jump Ring to attach the keychain to the crocheted Marina
- Pliers for attaching the keychain to the crocheted Marina
Optional Materials
- Stitch marker – I won’t be mentioning this in my pattern, but I rely on stitch markers to keep track of my stitch count and the start of my rows when I am crocheting.
- Pins – I use pins to help visualize where pieces should go and help keep the pieces in the right location while sewing.
Pattern Abbreviations
sc – single crochet
inc – increase
dec – decrease, you can use a normal decrease, but I like to use the invisible decrease
[…] x # – follow the steps inside the square brackets # amount of times, then move onto the next step
You will also need to know how to create a magic circle.
Mouth
(Black and Pink yarn)
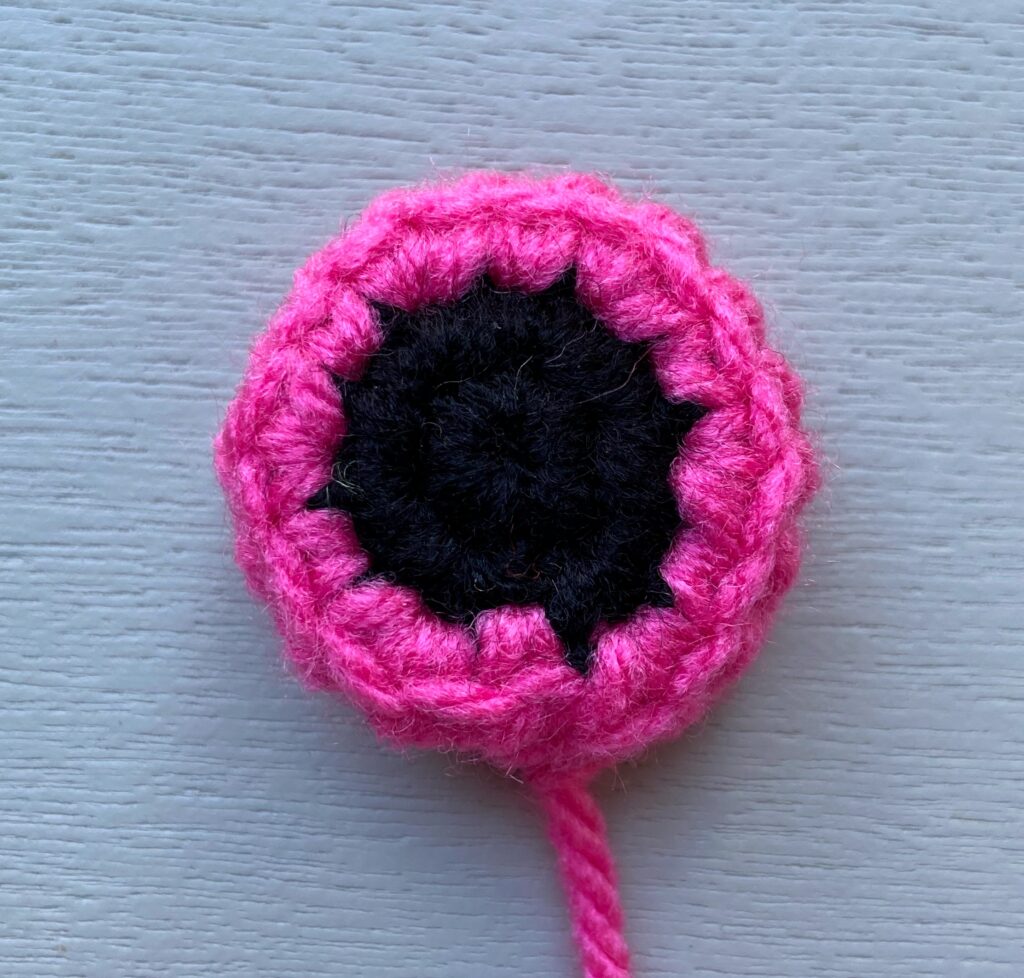
(Starting with black yarn)
Row 1. magic circle with 6 stitches (6)
Row 2. inc x 6 (12)
(Switch to pink yarn)
Row 3. [sc, inc] x 6 (18)
Row 4. sc in the back loops only x 18 (18)
Row 5. sc x 18 (18)
Fasten off and leave a long tail for sewing the mouth onto the head.

Head
(Pink yarn)
Row 1. magic circle with 6 stitches (6)
Row 2. inc x 6 (12)
Row 3. [sc, inc] x 6 (18)
Row 4. [sc x 2, inc] x 6 (24)
Row 5. [sc x 3, inc] x 6 (30)
Row 6. [sc x 4, inc] x 6 (36)
Row 7. sc x 36 (36)
Row 8. [sc x 11, inc] x 3 (39)
Row 9. sc x 39 (39)
Row 10. sc x 39 (39)
Row 11. sc x 6, inc, [sc x 12, inc] x 2, sc x 6 (42)
Row 12. sc x 42 (42)
Row 13. sc x 42 (42)
Row 14. sc x 42 (42)
Row 15. [sc x 5, dec] x 6 (36)
Row 16. [sc x 4, dec] x 6 (30)
Row 17. [sc x 3, dec] x 6 (24)

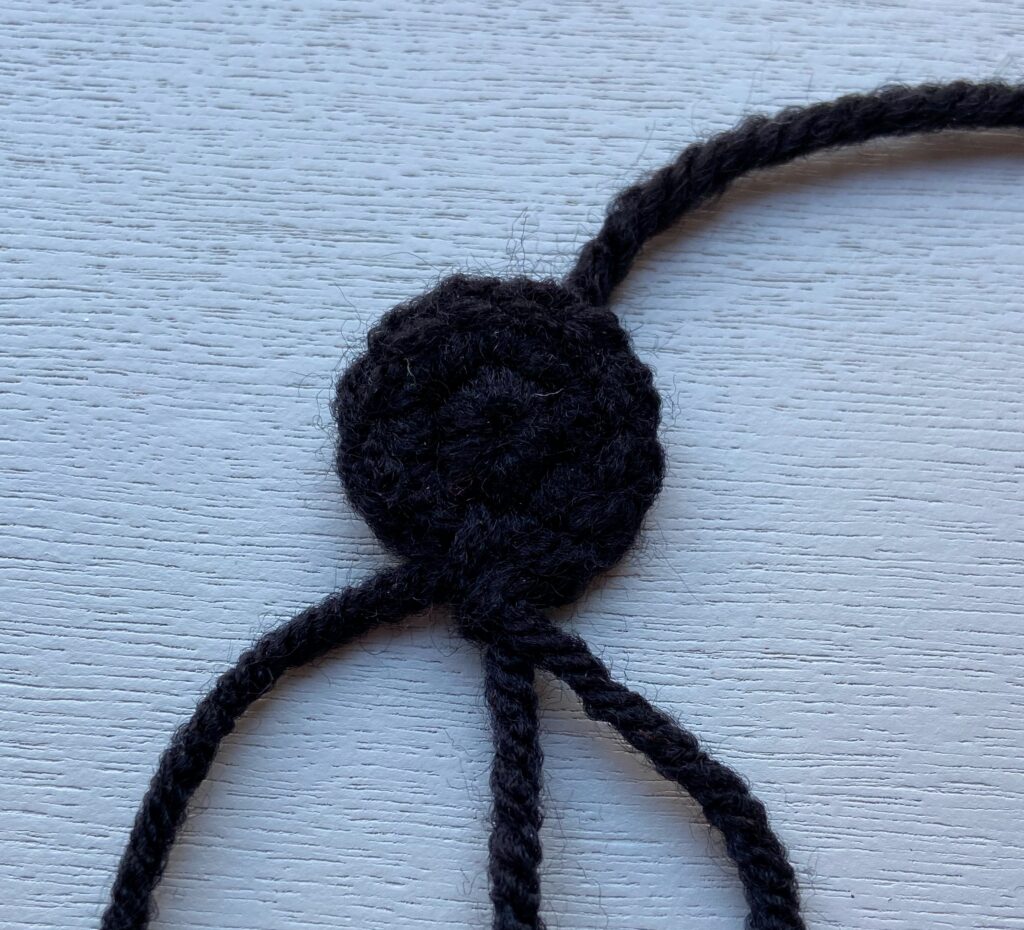
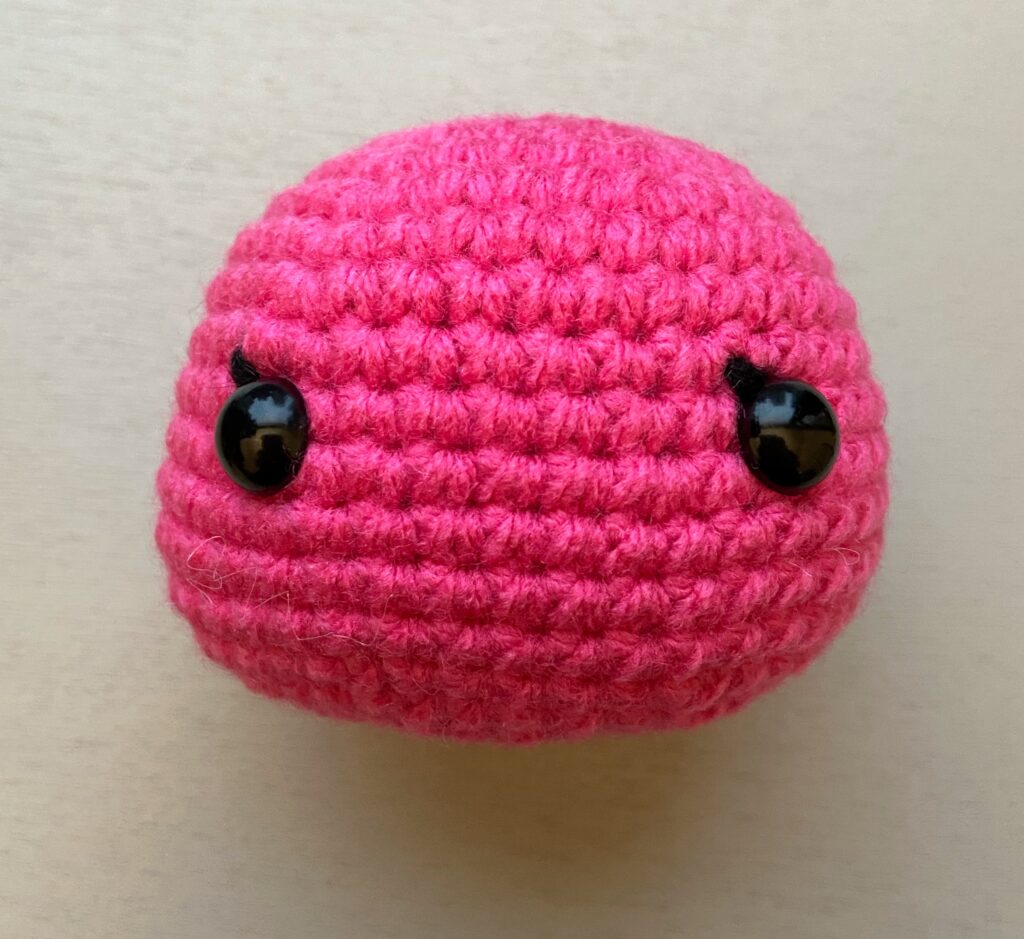
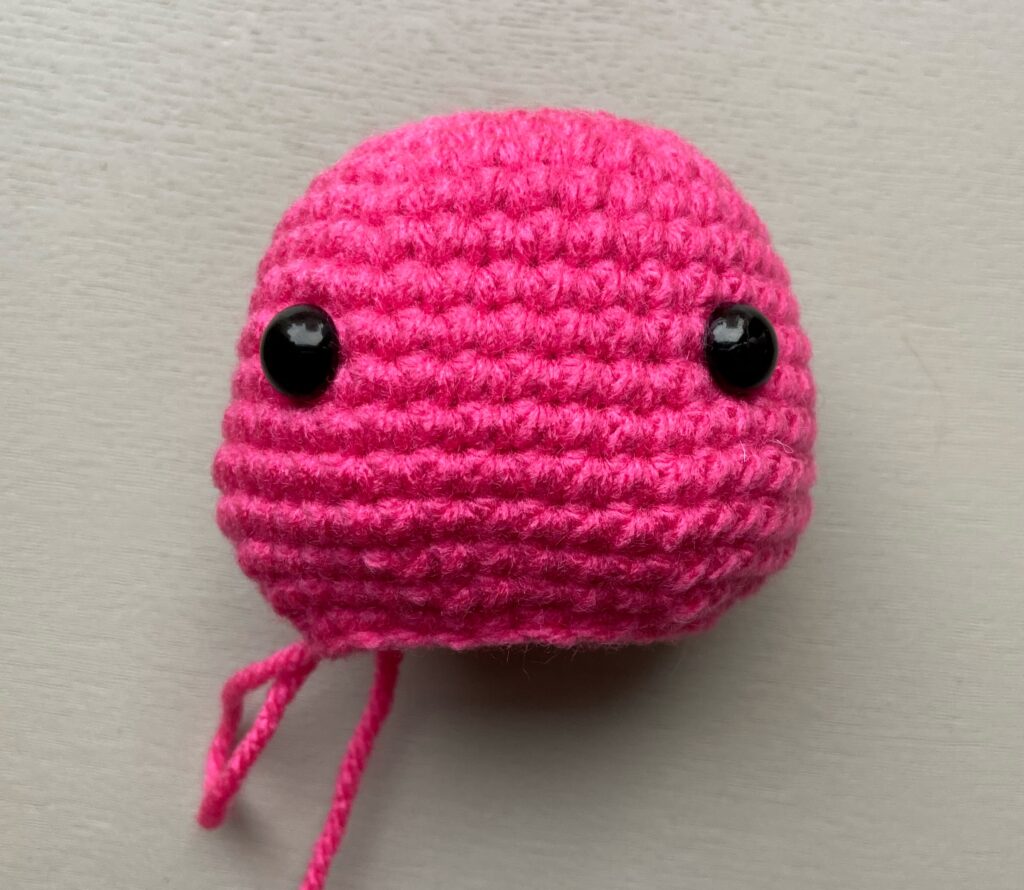
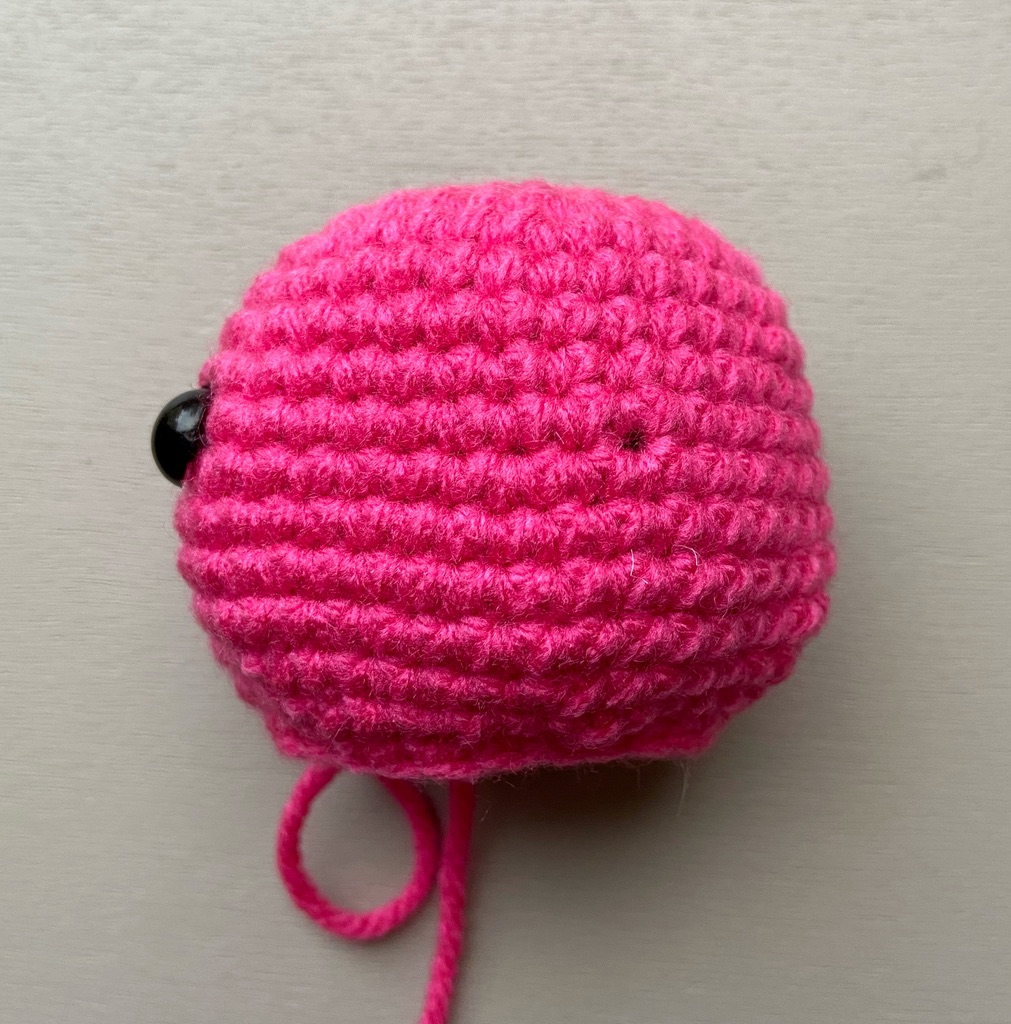
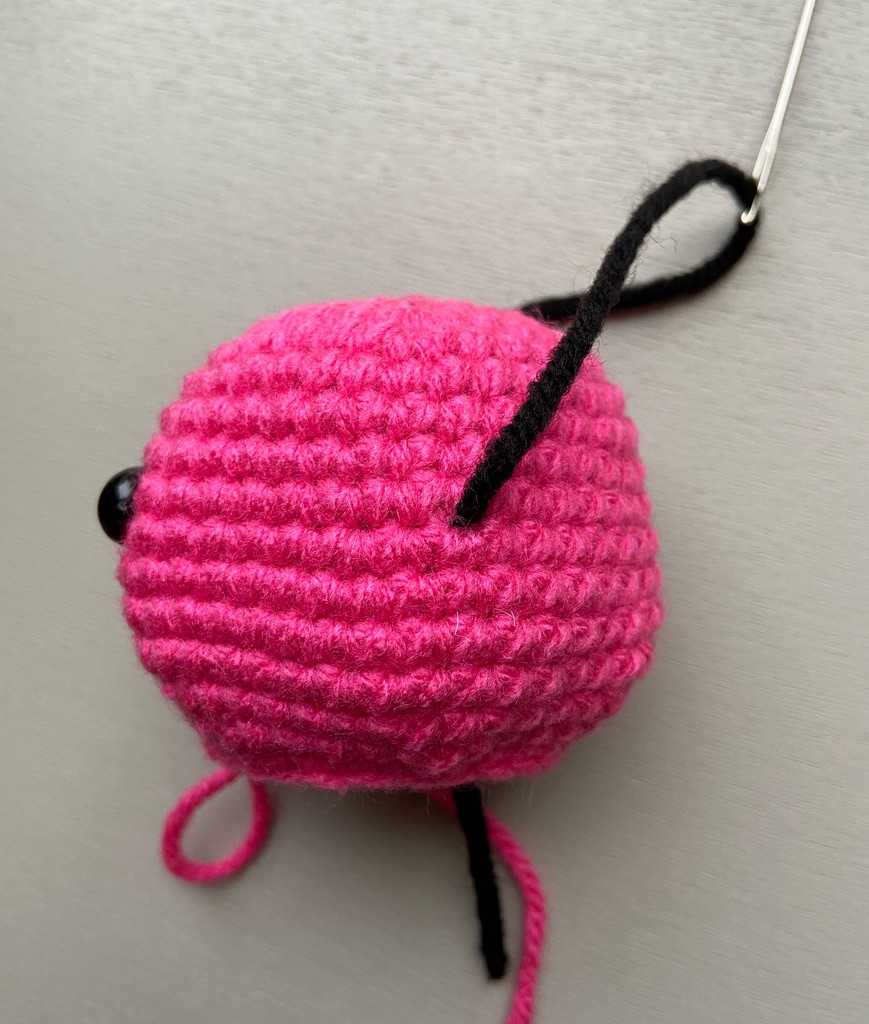
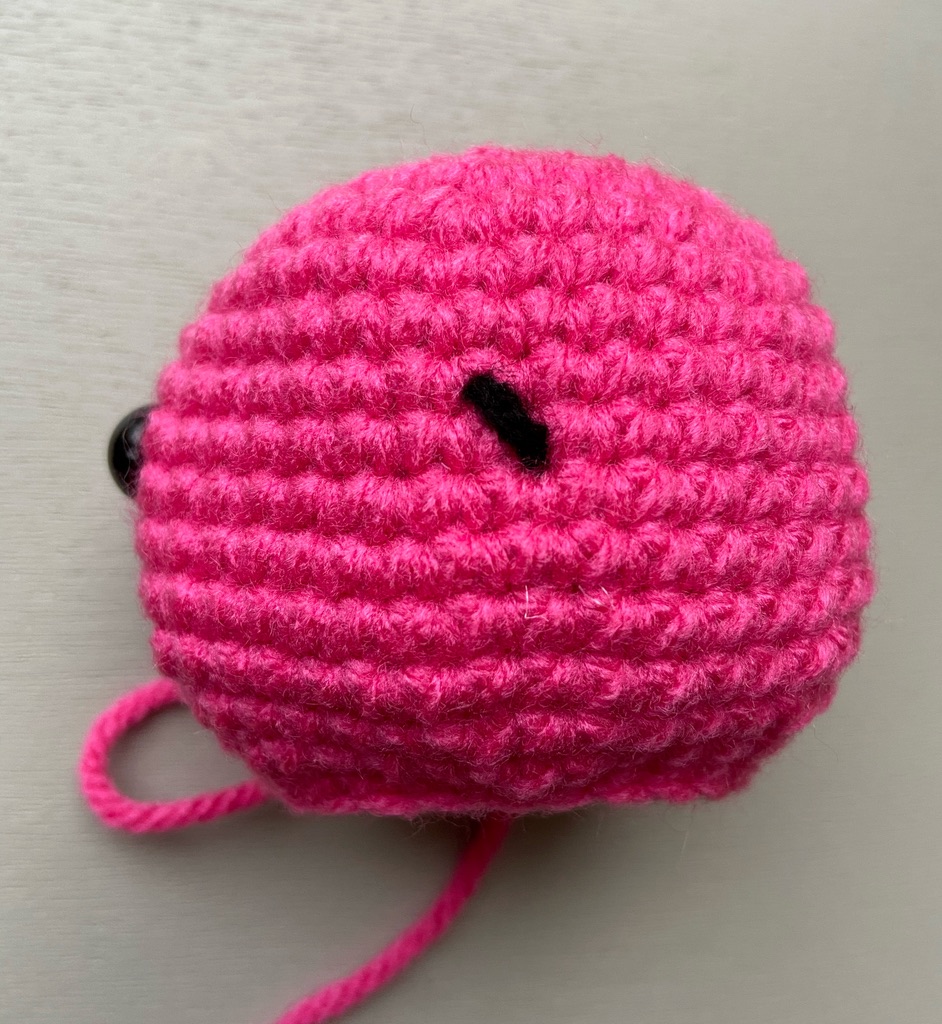
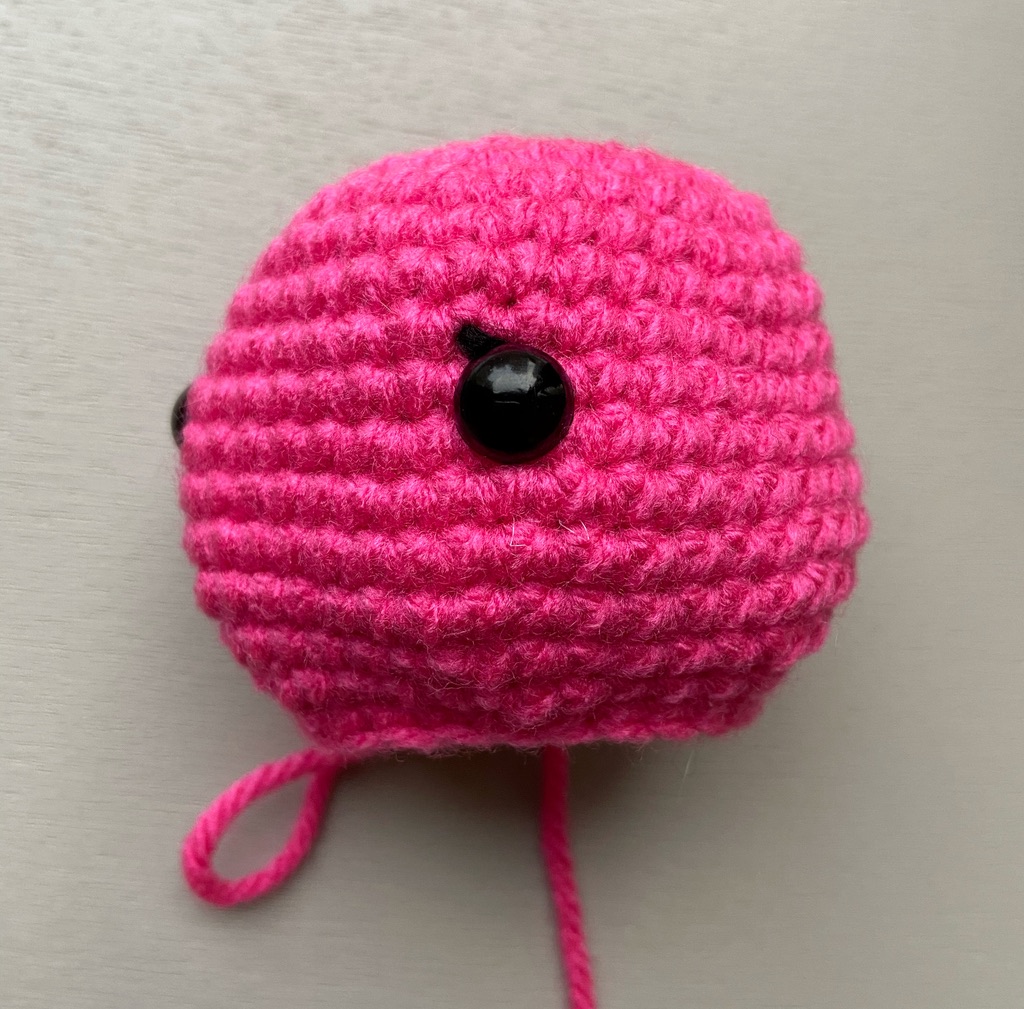
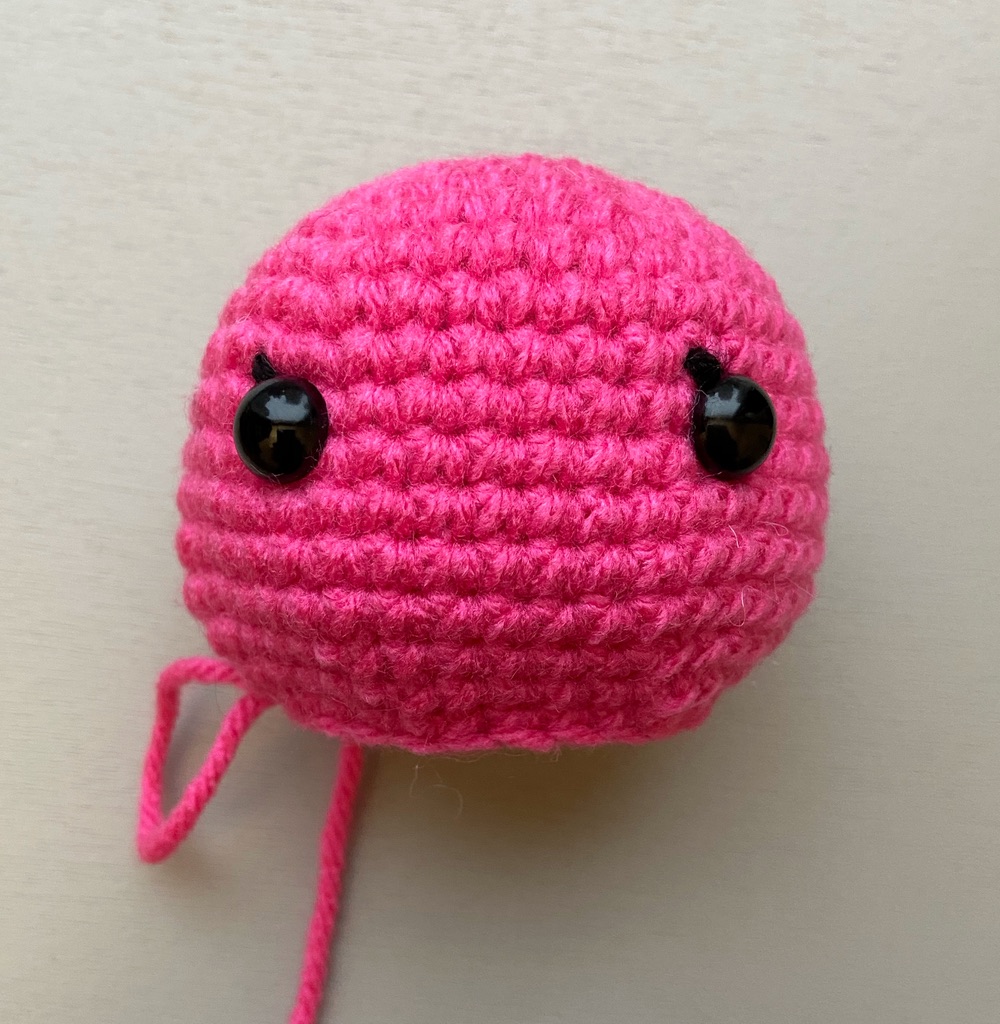
Now we will place the eyes, sew on the eyelashes, and secure the 9mm safety eyes. Please follow the below step-by-step picture tutorial to add these details onto the face.
Row 18. [sc x 2, dec] x 6 (18)
Stuff the head firmly.
Row 19. [sc, dec] x 6 (12)
Row 20. dec x 6 (6)
Sew the head closed, fasten off, and weave in any loose ends.
Putting the Pieces Together
Now that we have completed crocheting the pieces for our Marina keychain, it is time to put them together and add the felt details.
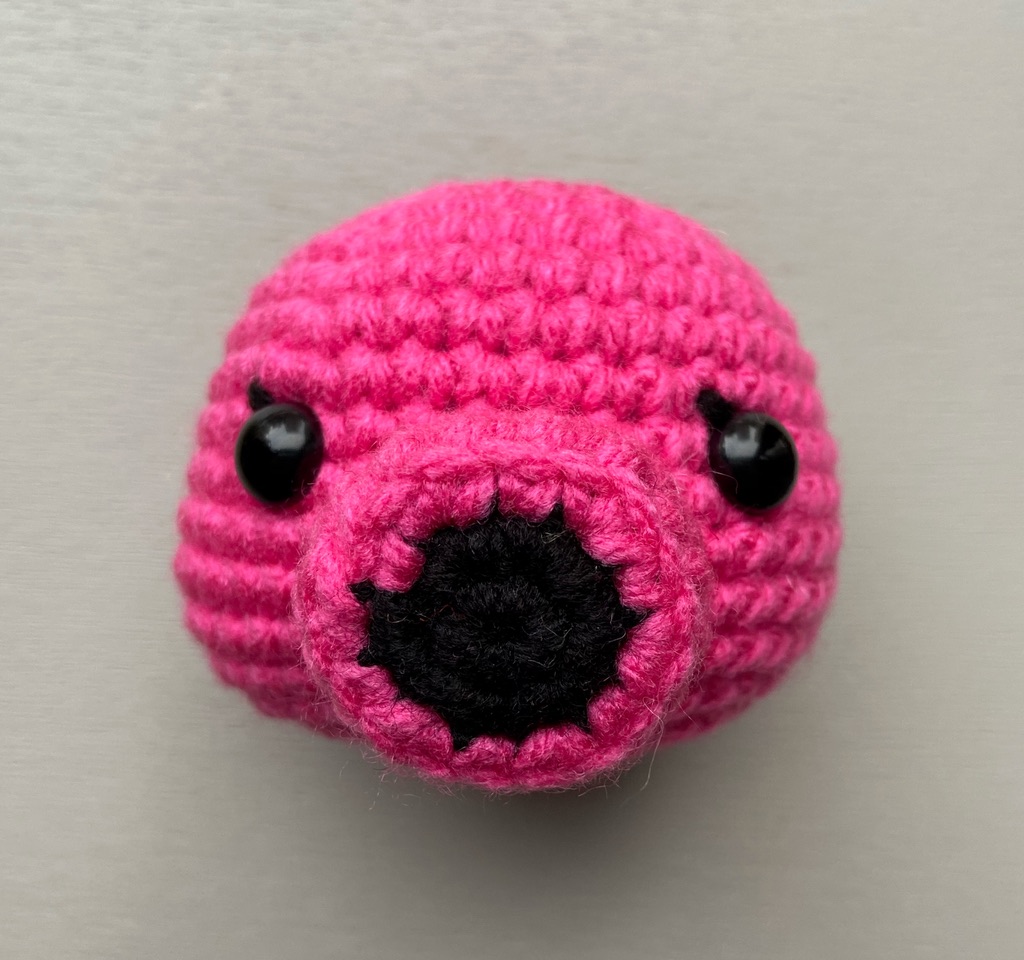
Sew the mouth onto Marina’s head. I have centered the mouth between the eyes, with the top of the mouth starting between rows 9 and 10. Below are some pictures showing the placement of the mouth.

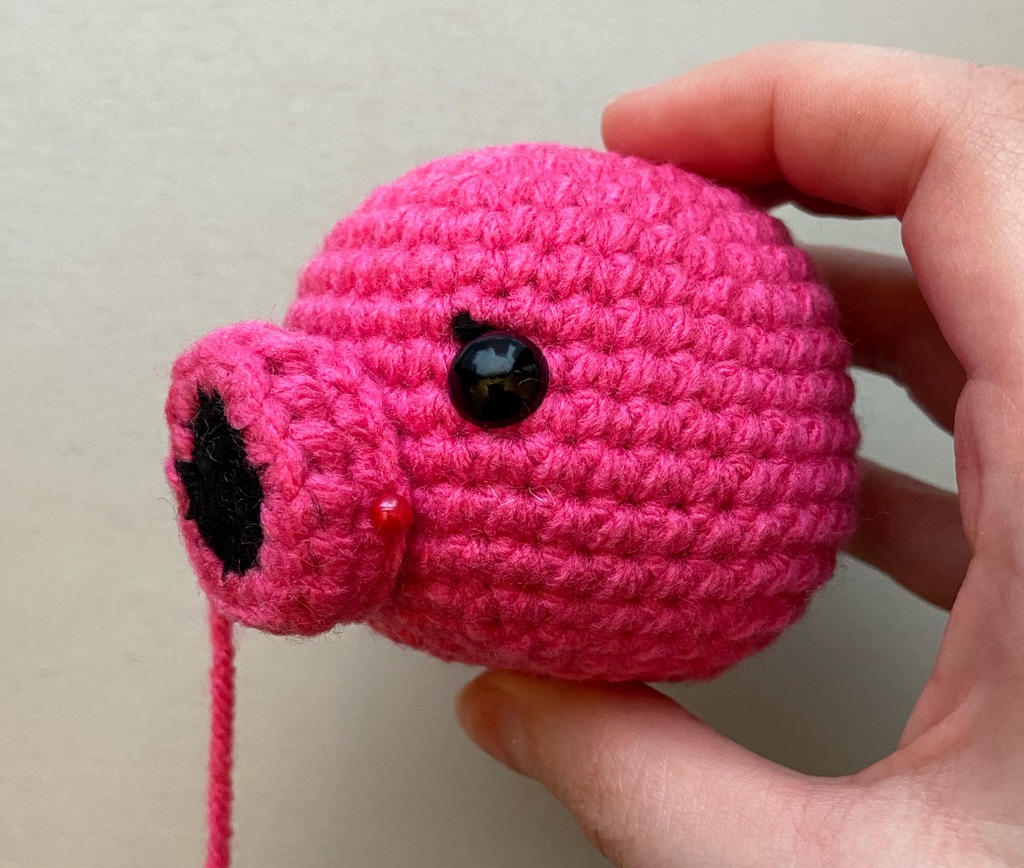
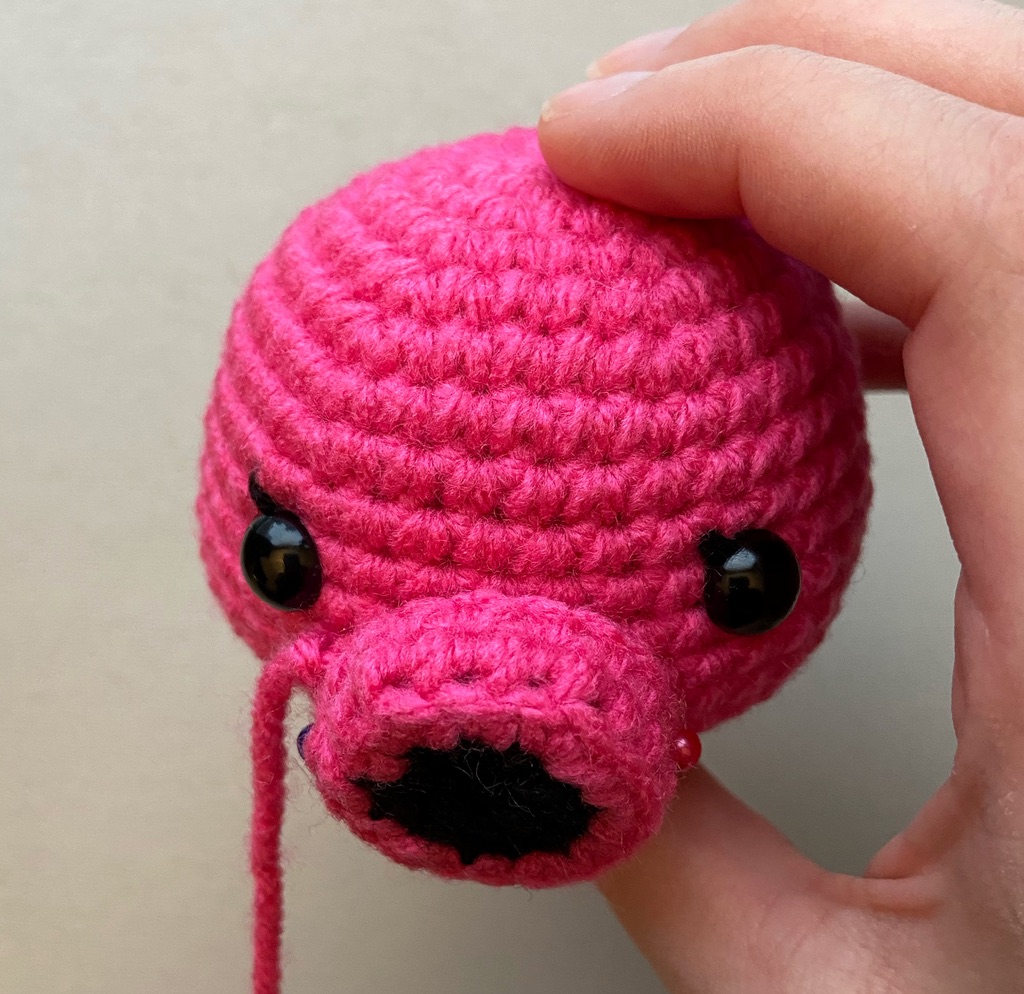
Once you’ve finished sewing on the mouth, your Marina should look like the image below.
Adding the Felt Details
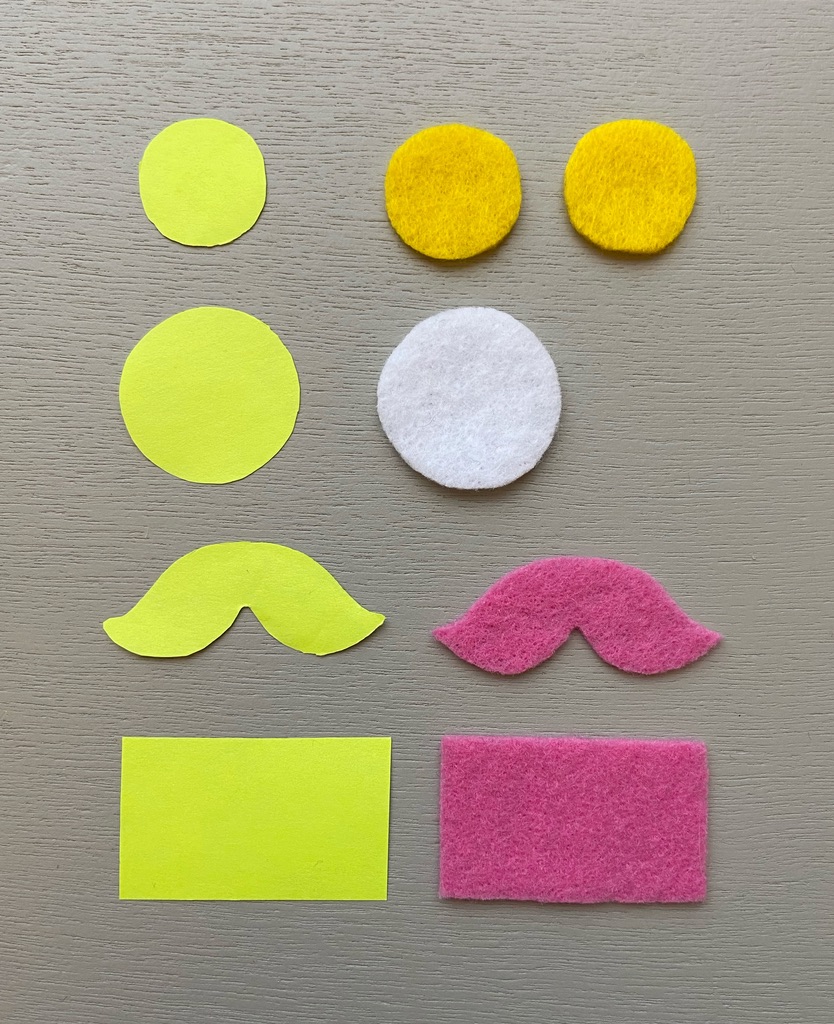
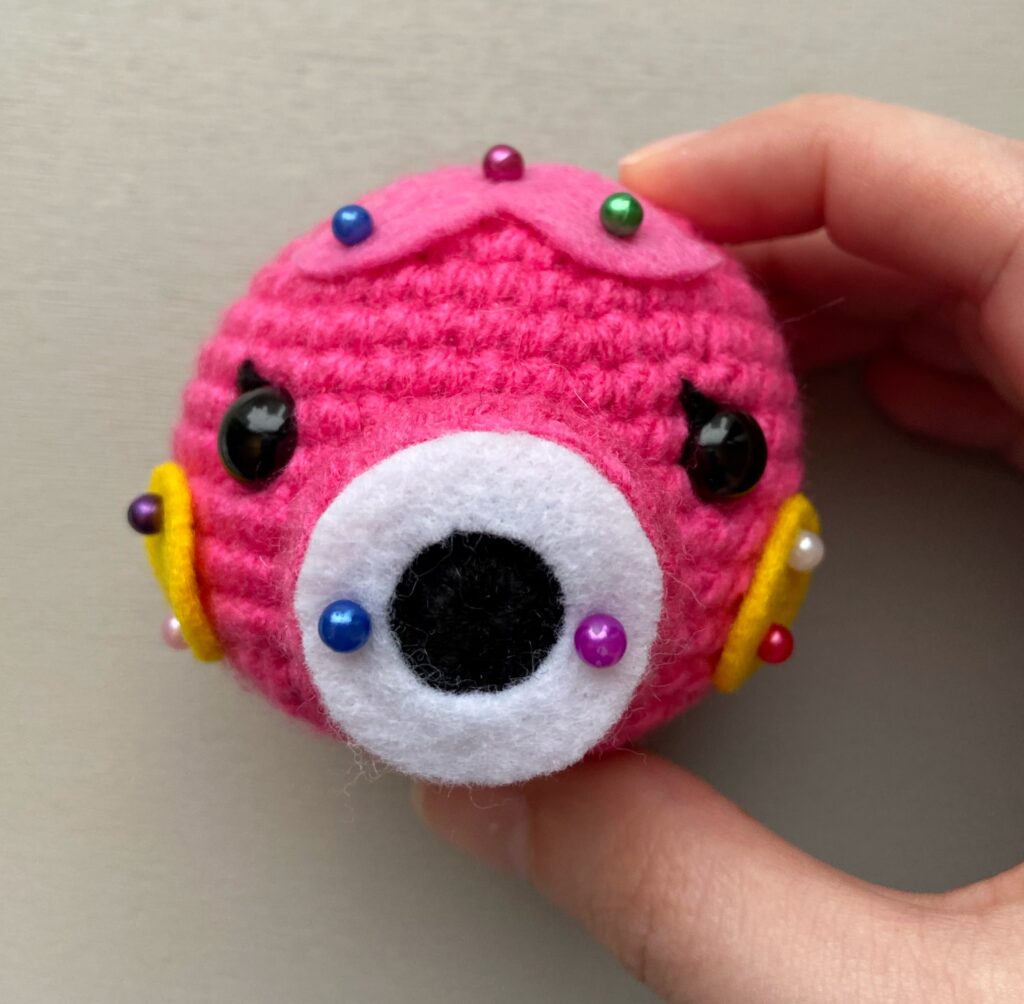
Using yellow felt, cut out two small circles for the cheeks. Mine are a tiny bit smaller than a US nickel.
Using white felt, cut out a circle that we will use to create Marina’s lips. I placed her crocheted mouth onto a piece of paper and traced it out to create the perfect sized stencil for cutting out this circle.
Next, using pink felt, cut out Marina’s bangs. It should look similar to a pink mustache shape. It is about 1.5 inches wide.
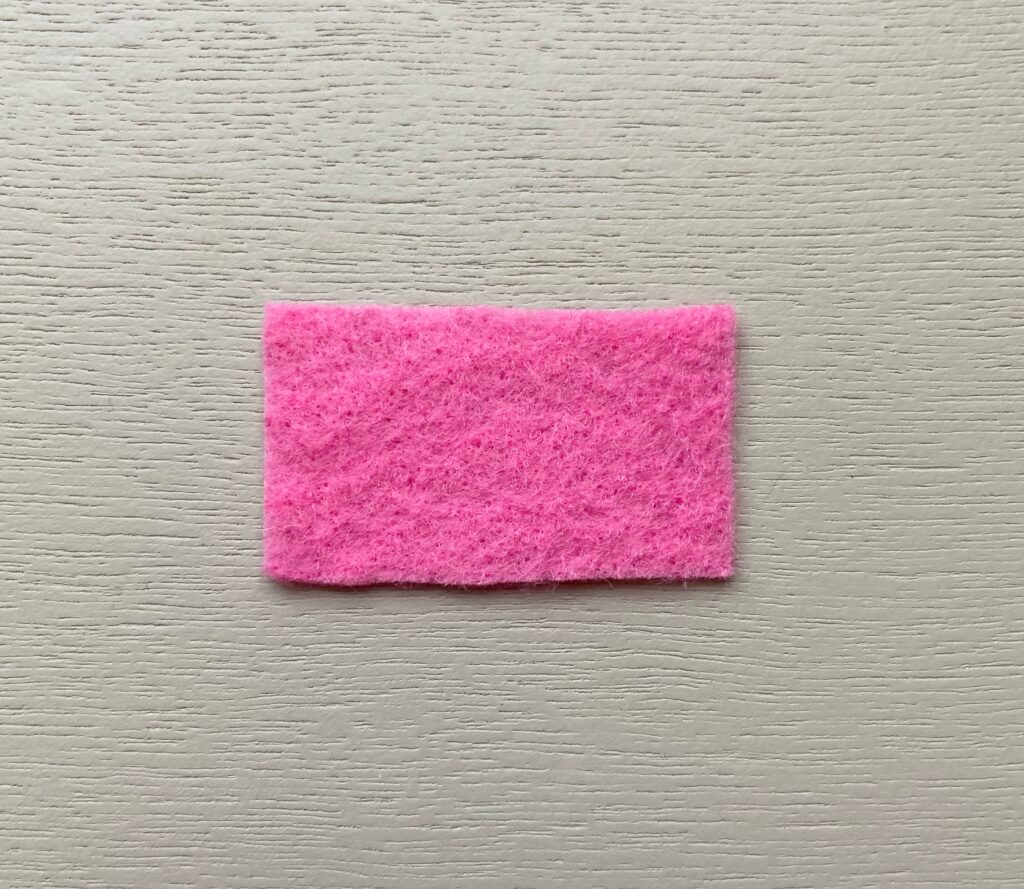
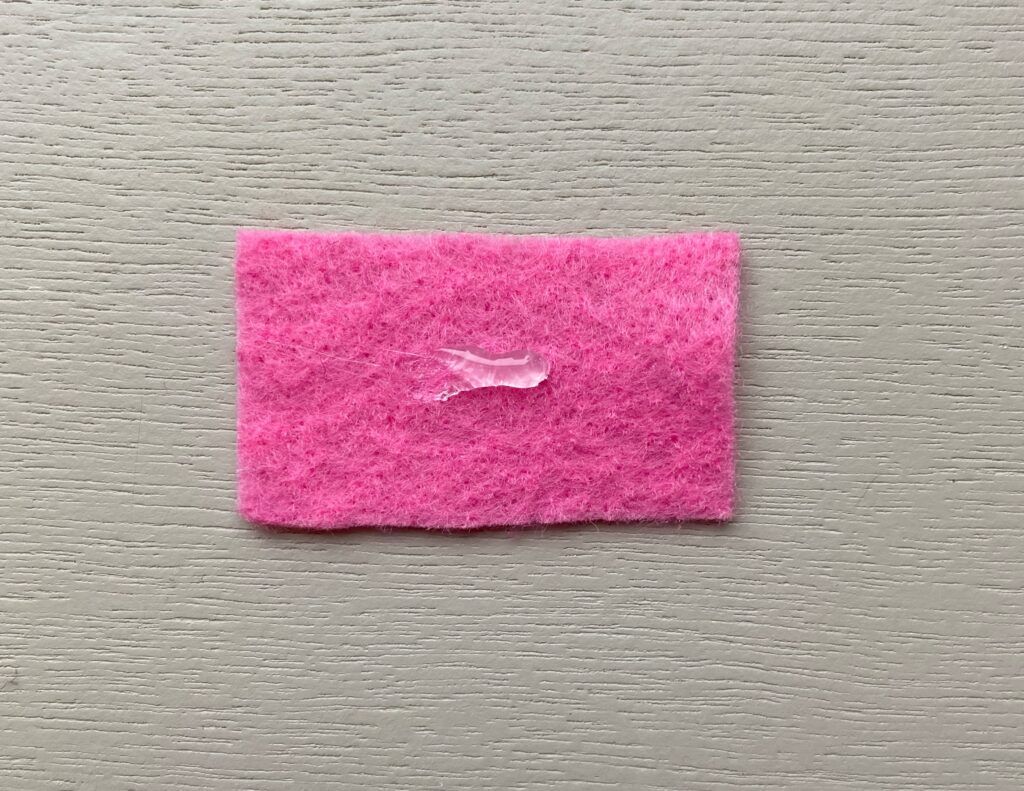
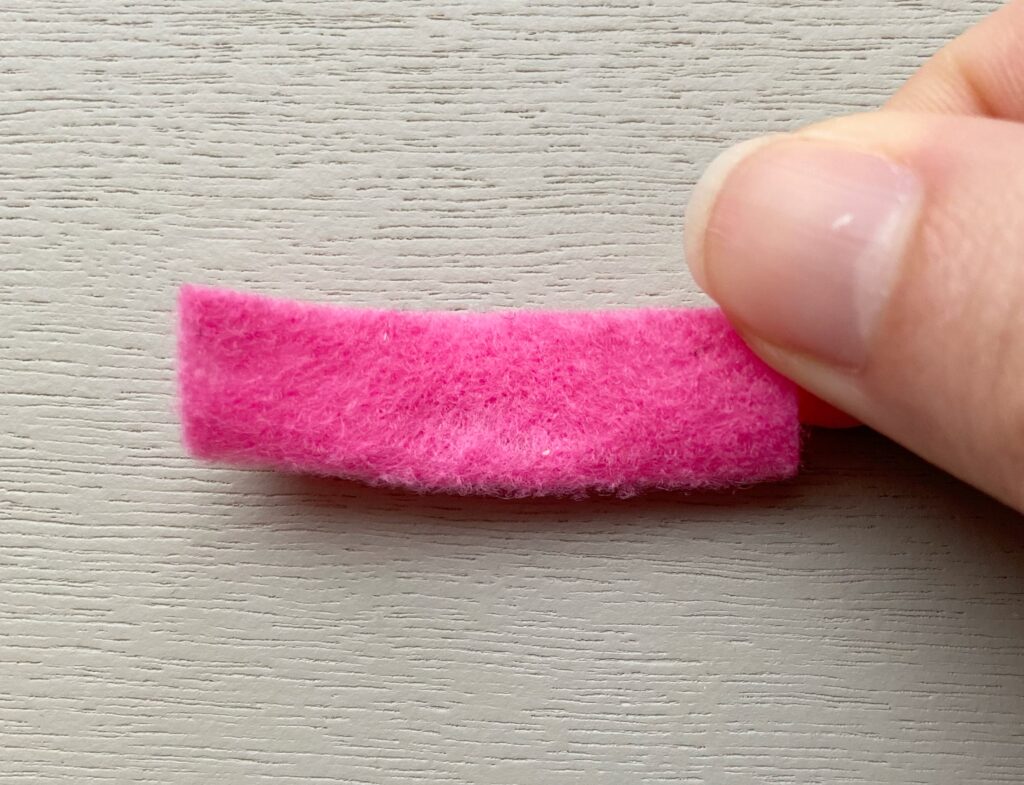
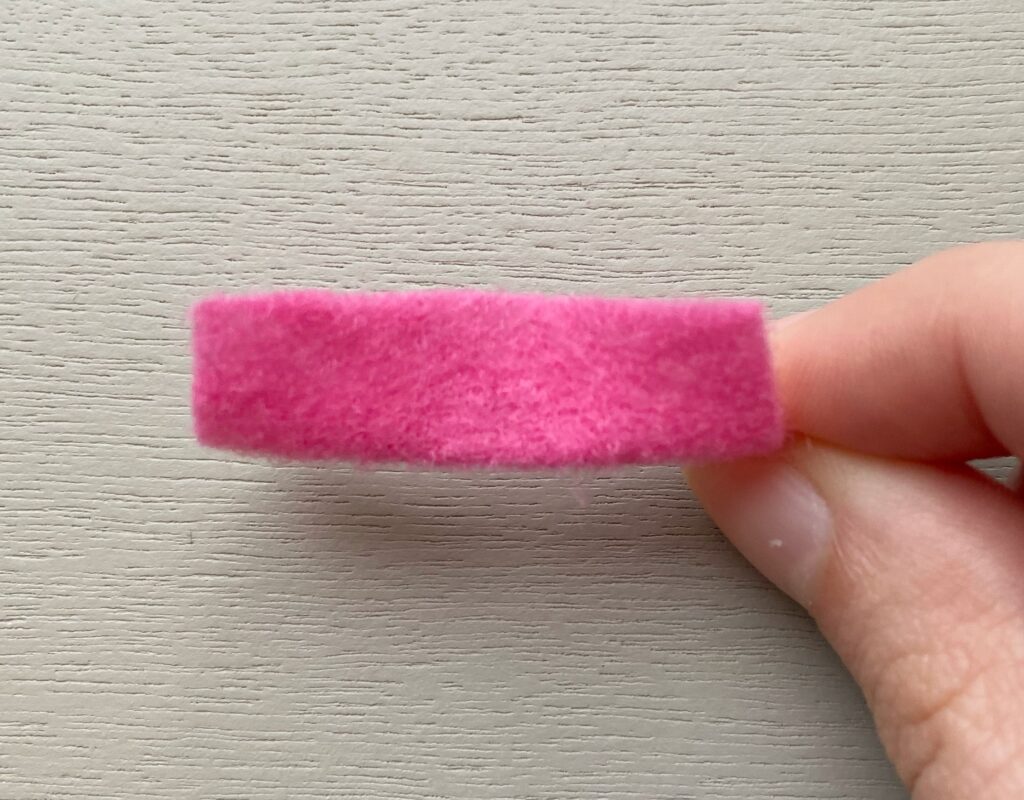
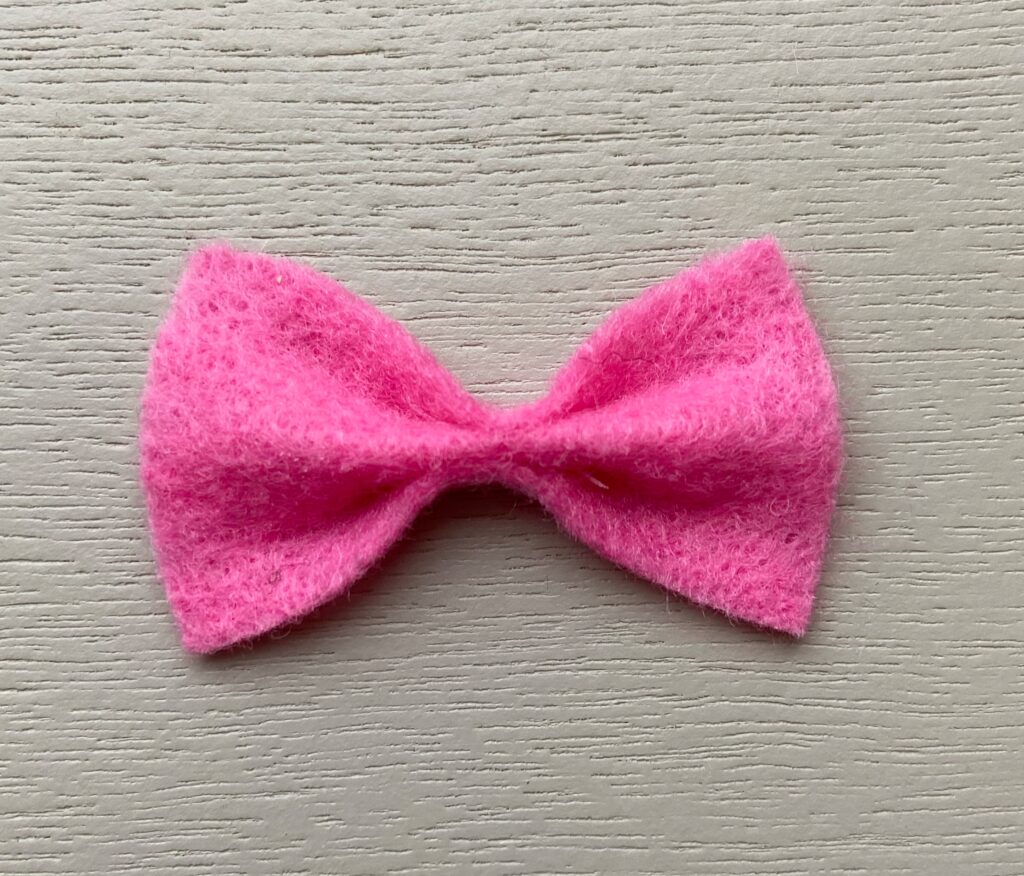
Lastly, using pink felt, cut out a rectangle. My rectangle is about .8 inches by 1.5 inches. We will use this to create Marina’s bow.
Marina’s Lips
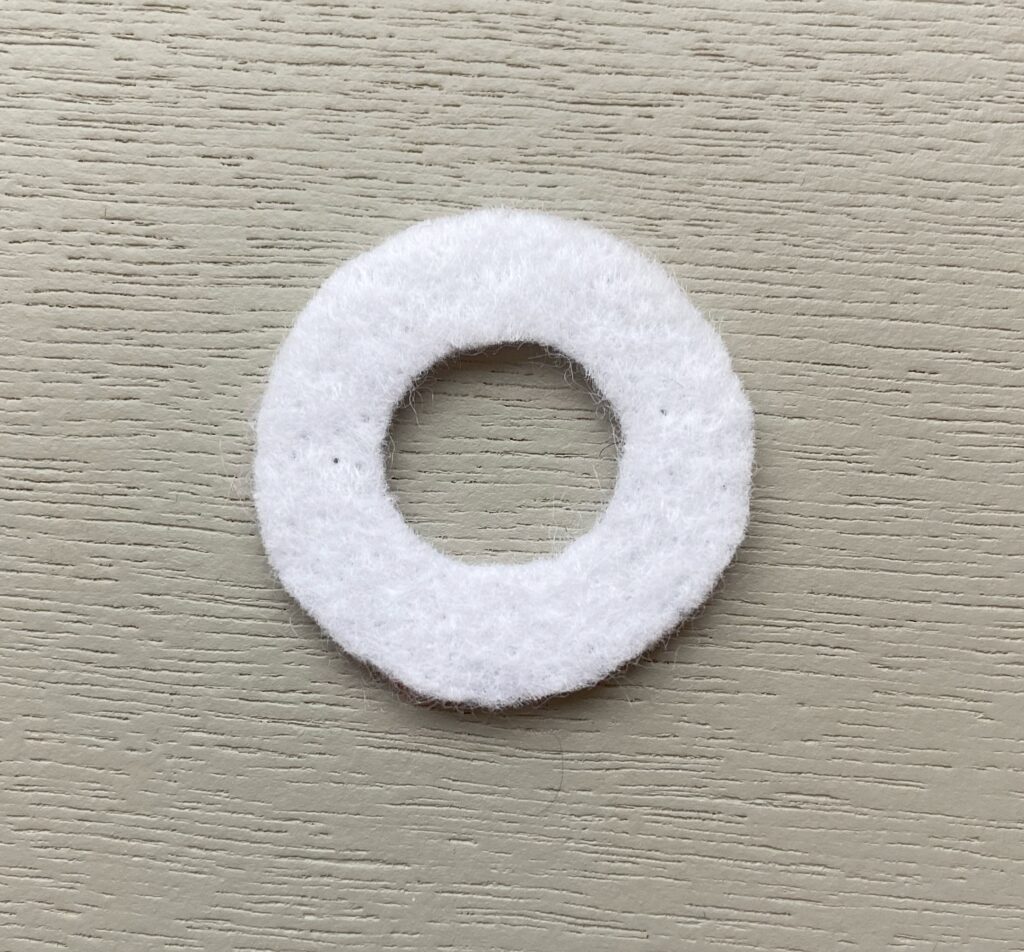
To finish the lips, we are going to take the white felt circle we cut out in the step above and cut out a small circle shape from the middle of the felt piece. (See the picture below.) This will create an O shape with the white felt. Feel free to make the lips as thick or thin as you’d like. You can test it out by placing the lips on the mouth and seeing if you like it!
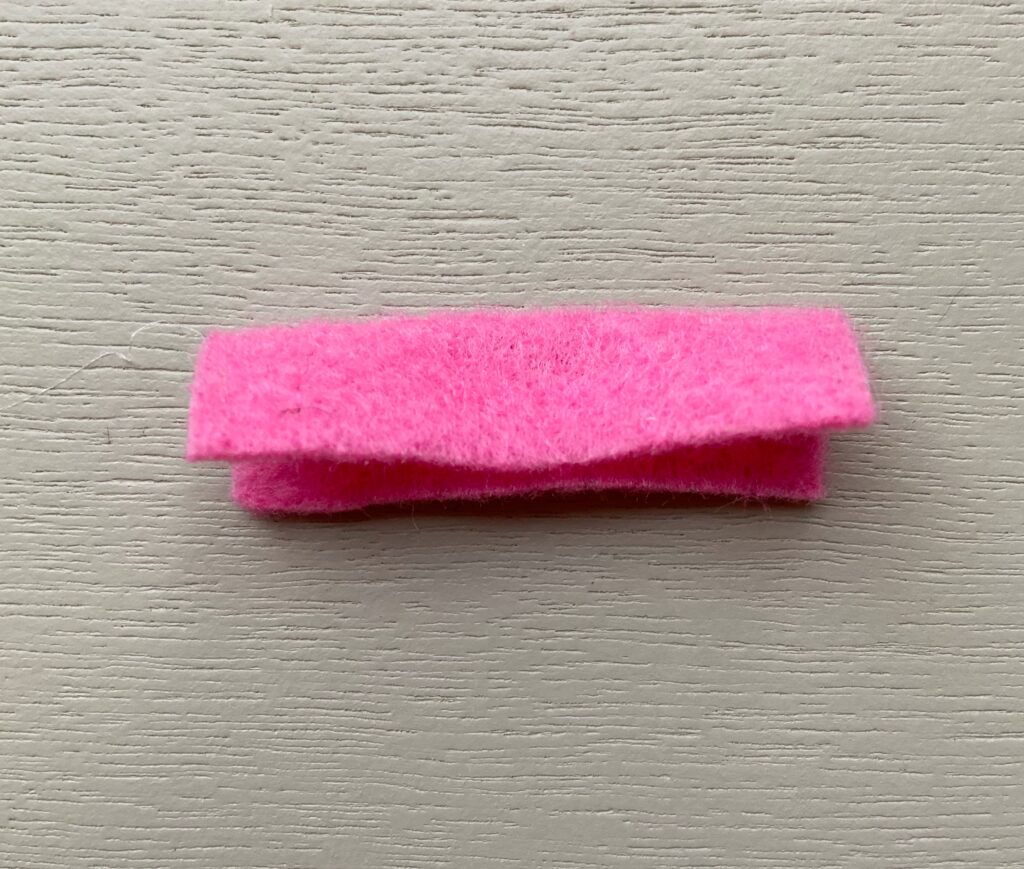
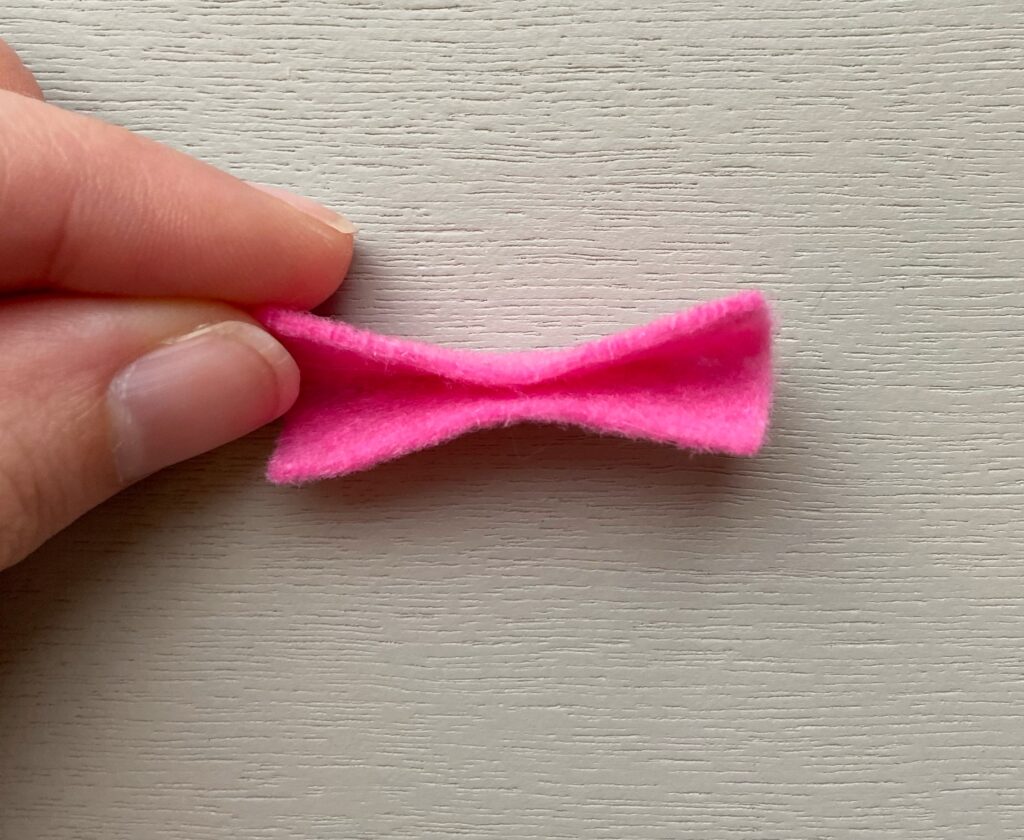
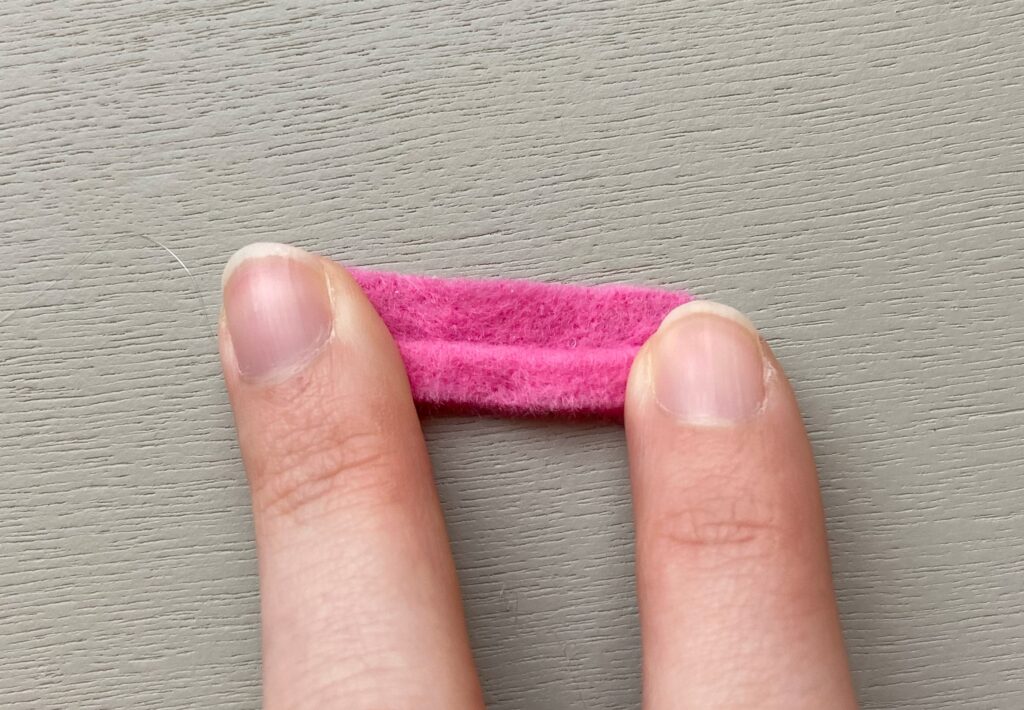
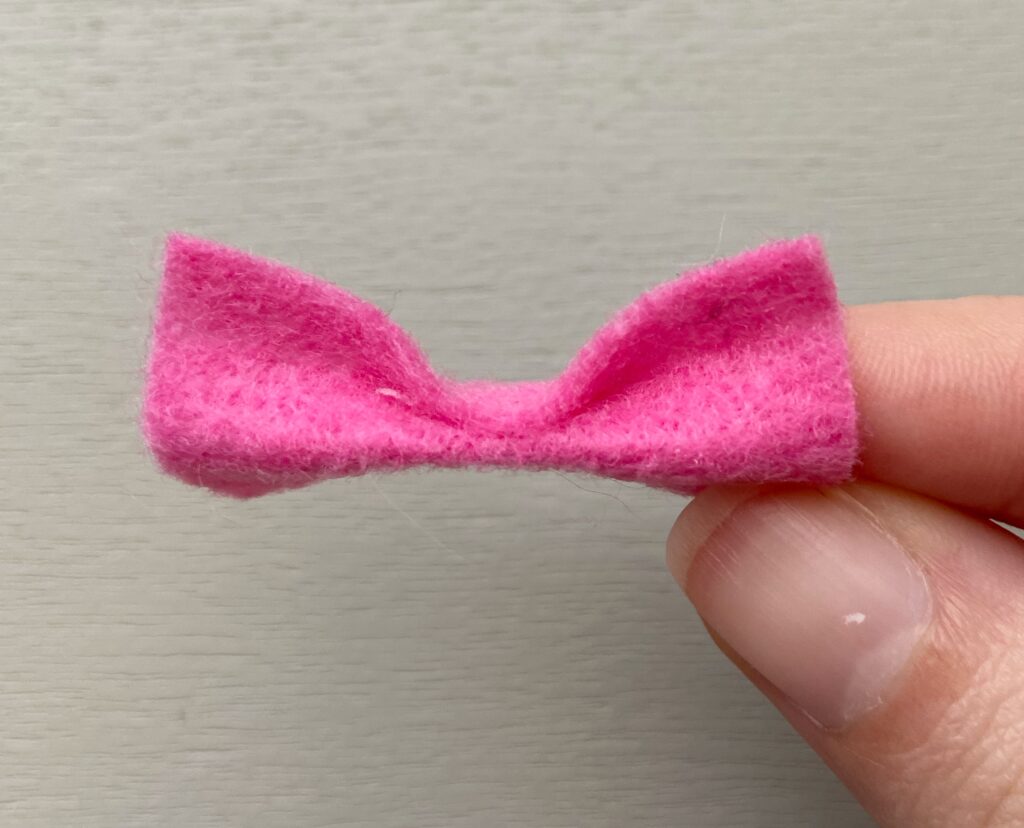
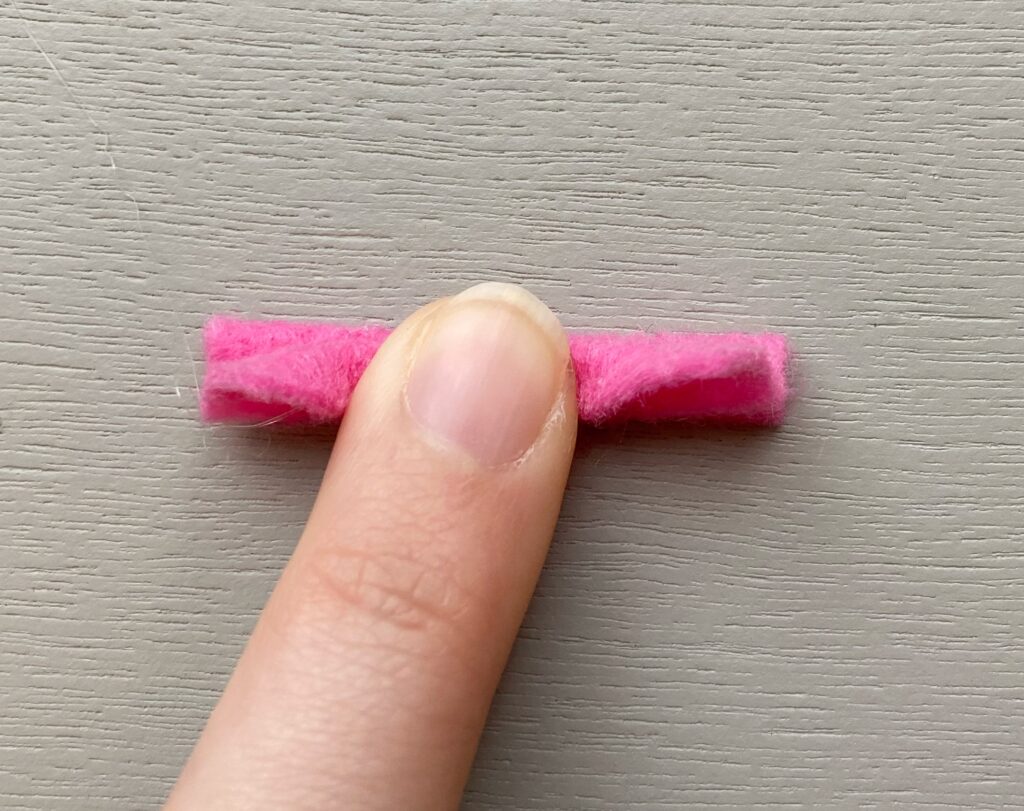
Marina’s Felt Bow
To create Marina’s bow, we are going to start with the pink rectangle we cut out a few steps ago. You will also need your hot glue gun and hot glue for this step. Below is a step-by-step picture tutorial. Since hot glue dries very quickly, it is best to read the instructions first to familiarize yourself with what you will be doing, then start for real.
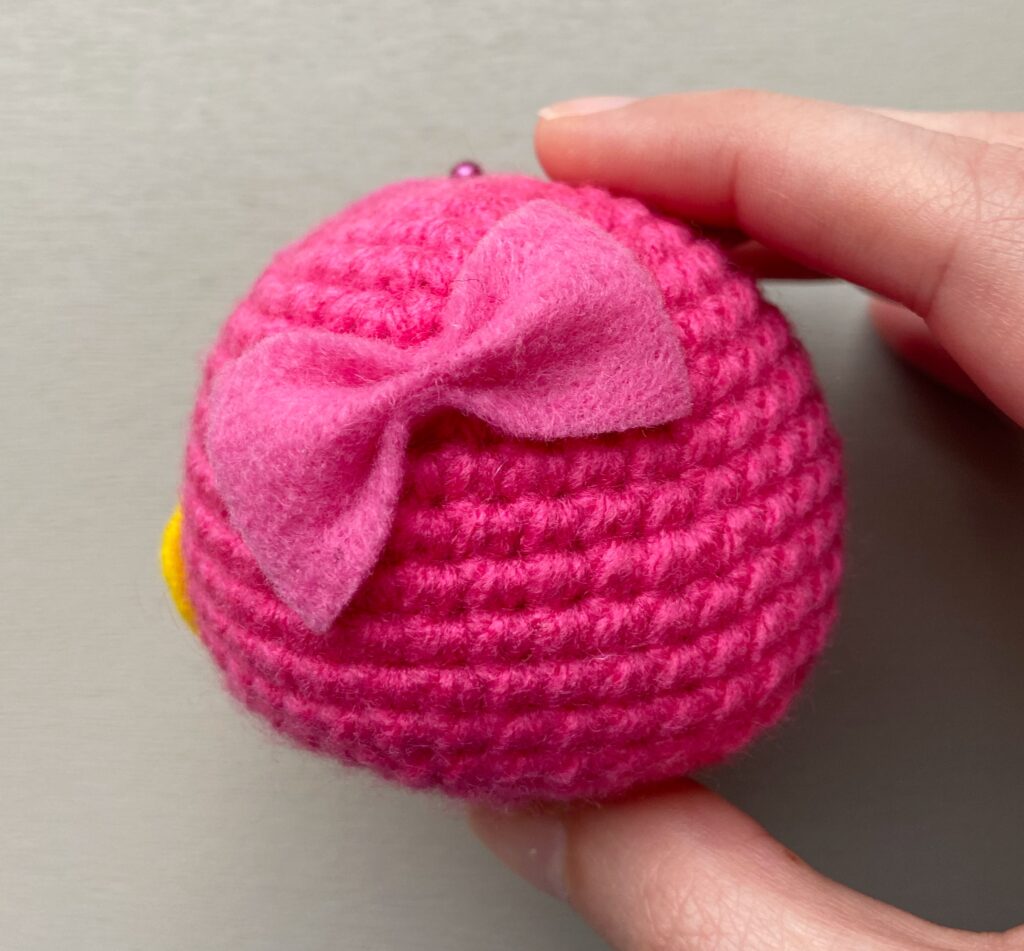
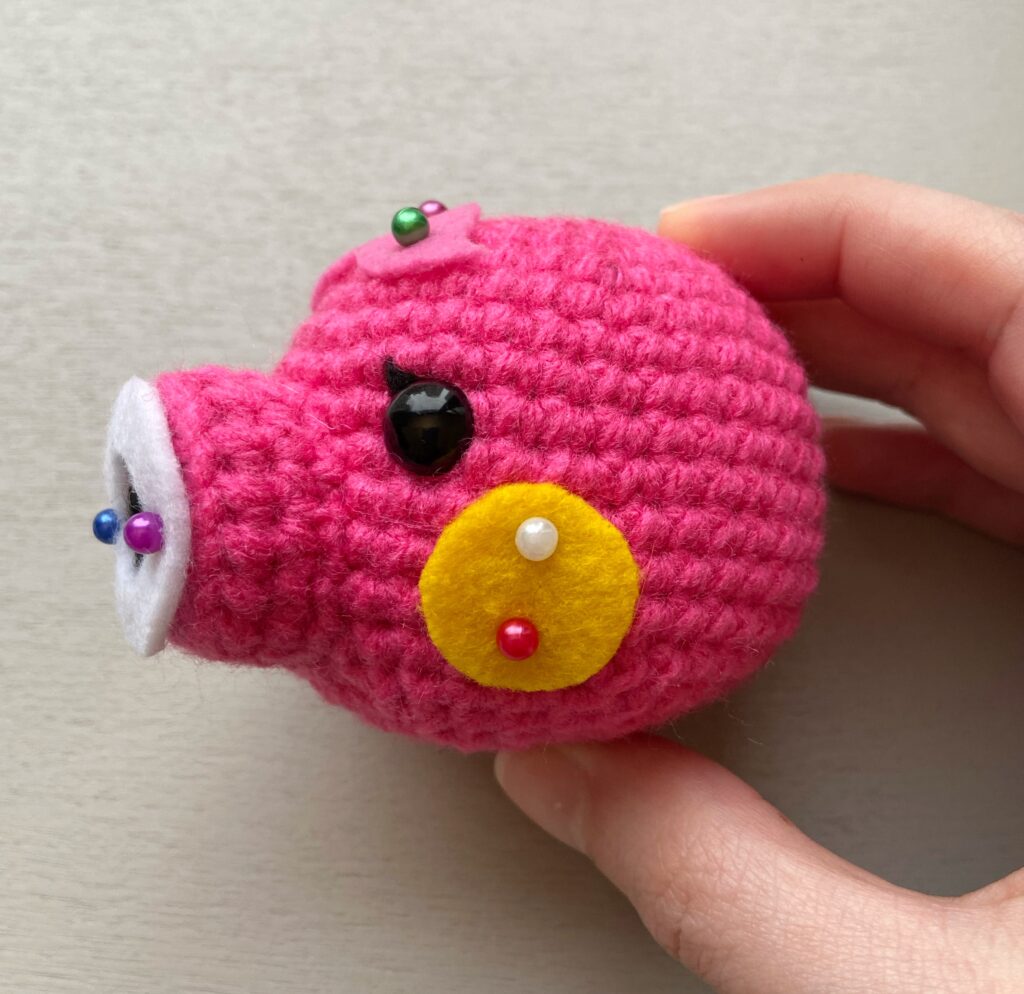
Now we can use our hot glue gun to glue the bow to our Marina. First, find the top of her head and count about 8 rows down. Then, off-center the bow to the left.
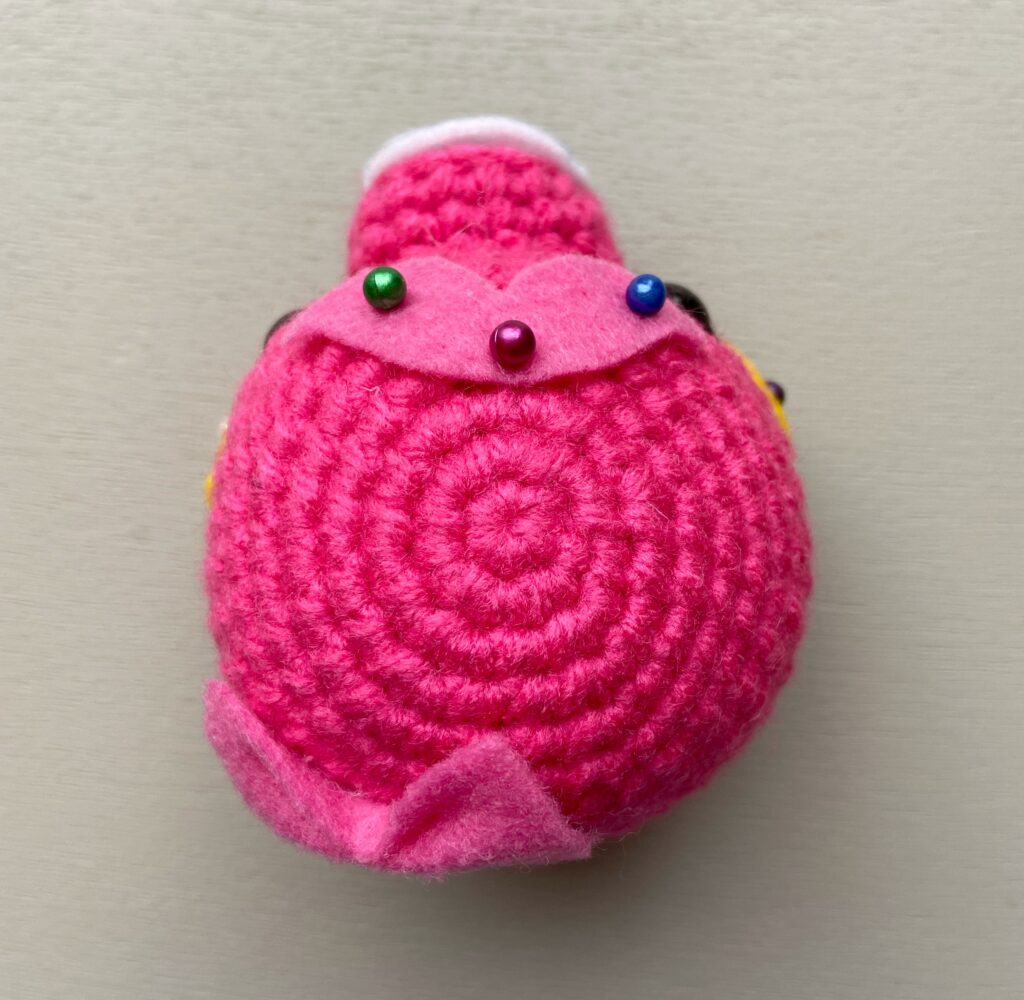
Next, tilt the bow down and to the left. Once you are happy with the placement of the bow, use your hot glue gun to glue the bow in place.
Now it is time to place the rest of the felt pieces. If you have pins, use them to secure each piece onto your Marina. Alternatively, you can place each piece down and hold them down with your fingers while you glue them to your Marina.
Pin the white lips onto the mouth of your Marina, centering it to fit her mouth. See the below photo for an example.
I pinned Marina’s bangs in the center of her forehead, with the top of the bangs starting at the edge of row 3.
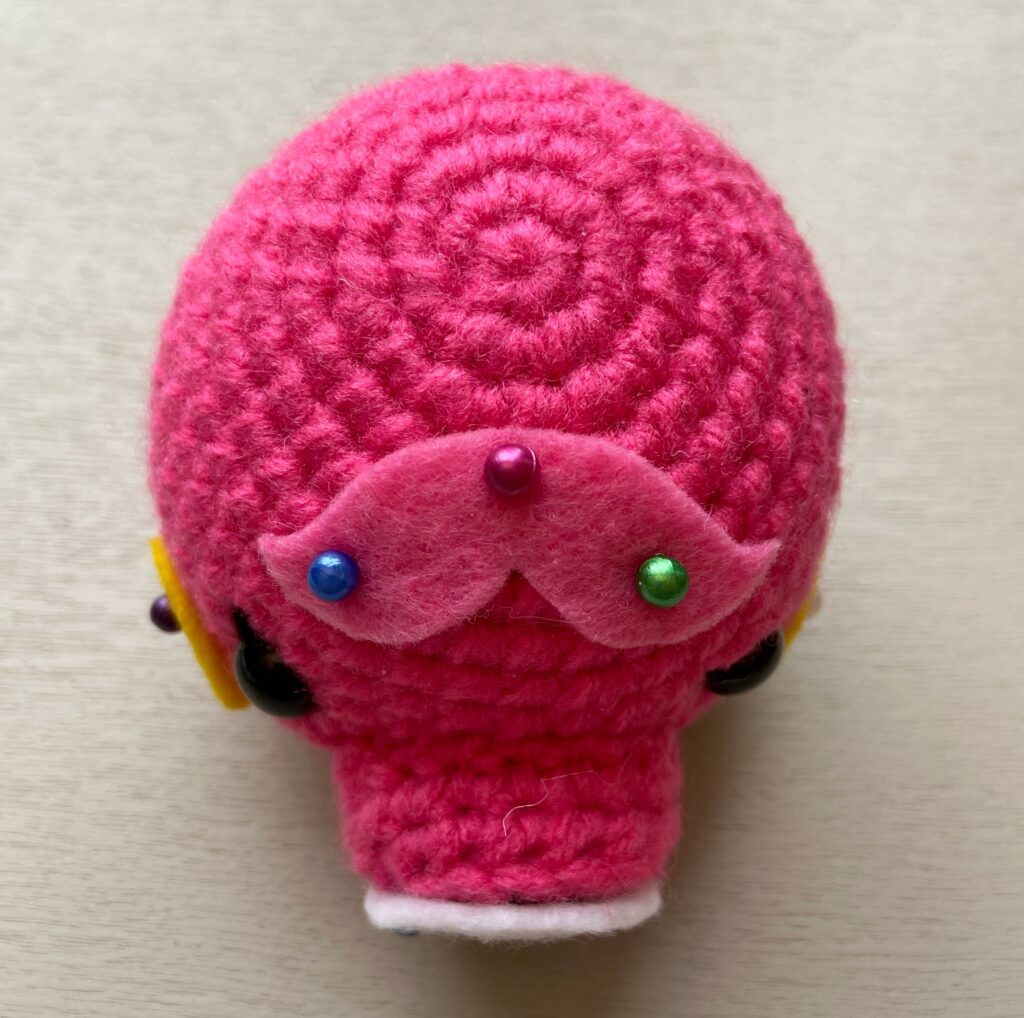
For Marina’s Cheeks, I found the row that the bottom half of Marina’s eyes overlapped. I pinned Marina’s cheeks starting at the bottom of this row, diagonally to the side of her eye (to the right side if it is her right eye, to the left side if it is her left eye).
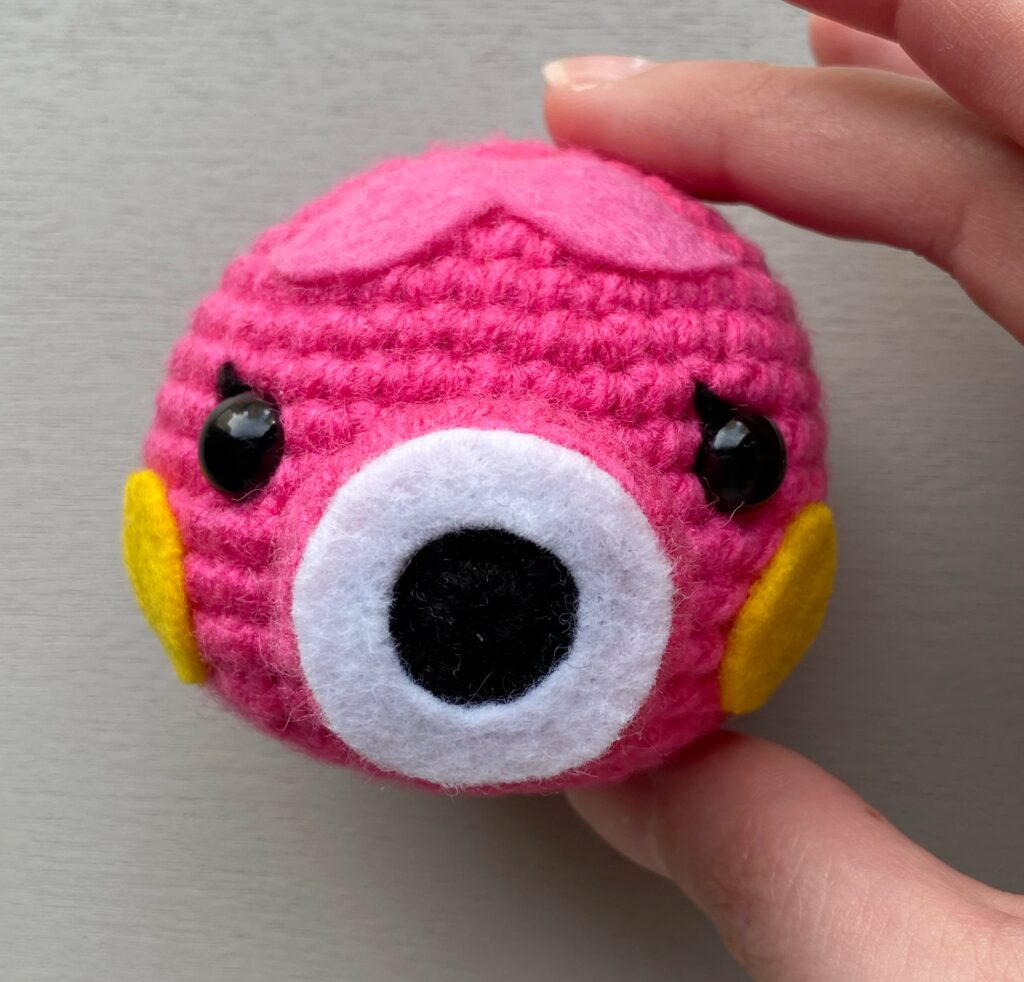
Next, use your hot glue gun to glue each felt piece to your Marina. Once you have finished glueing, your Marina should resemble the image below.
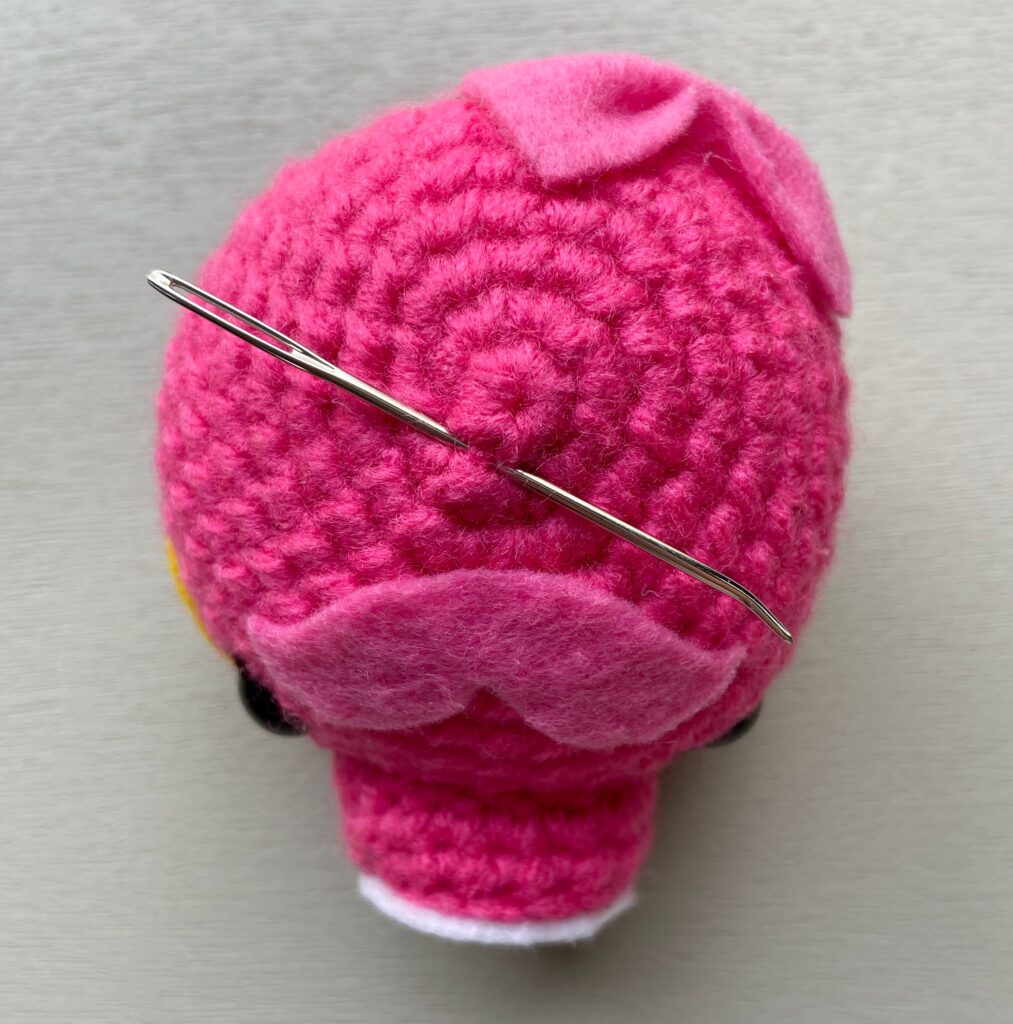
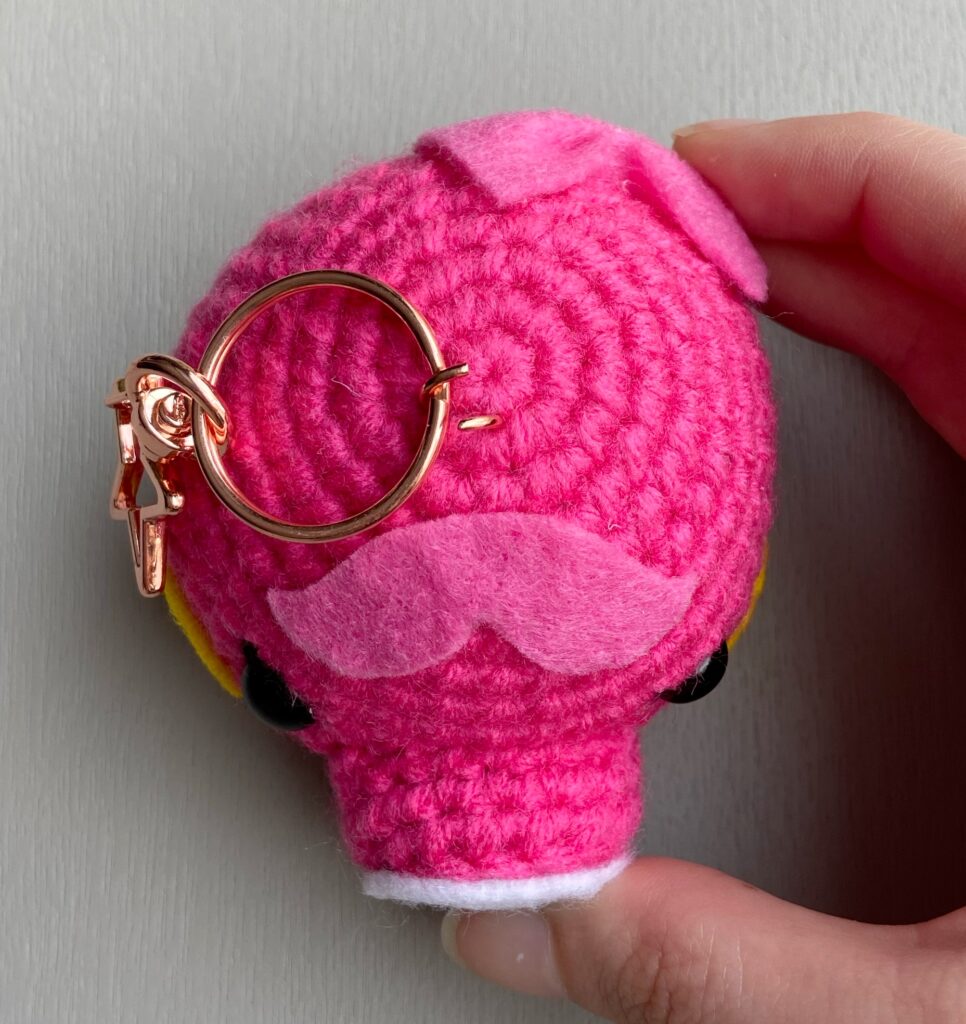
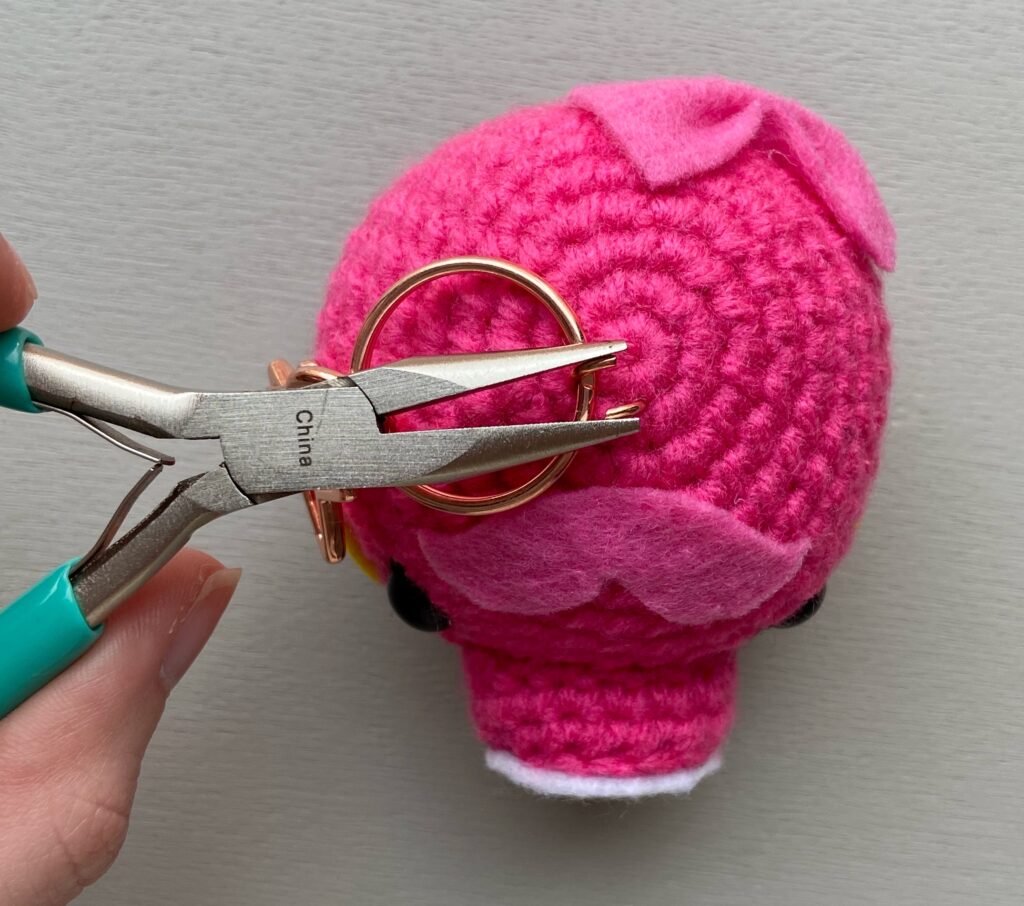
Attaching the Keychain
Now it is time to secure the keychain to our Marina. To do this, you will need to get out your keychain, jump ring, pliers, and your yarn needle.

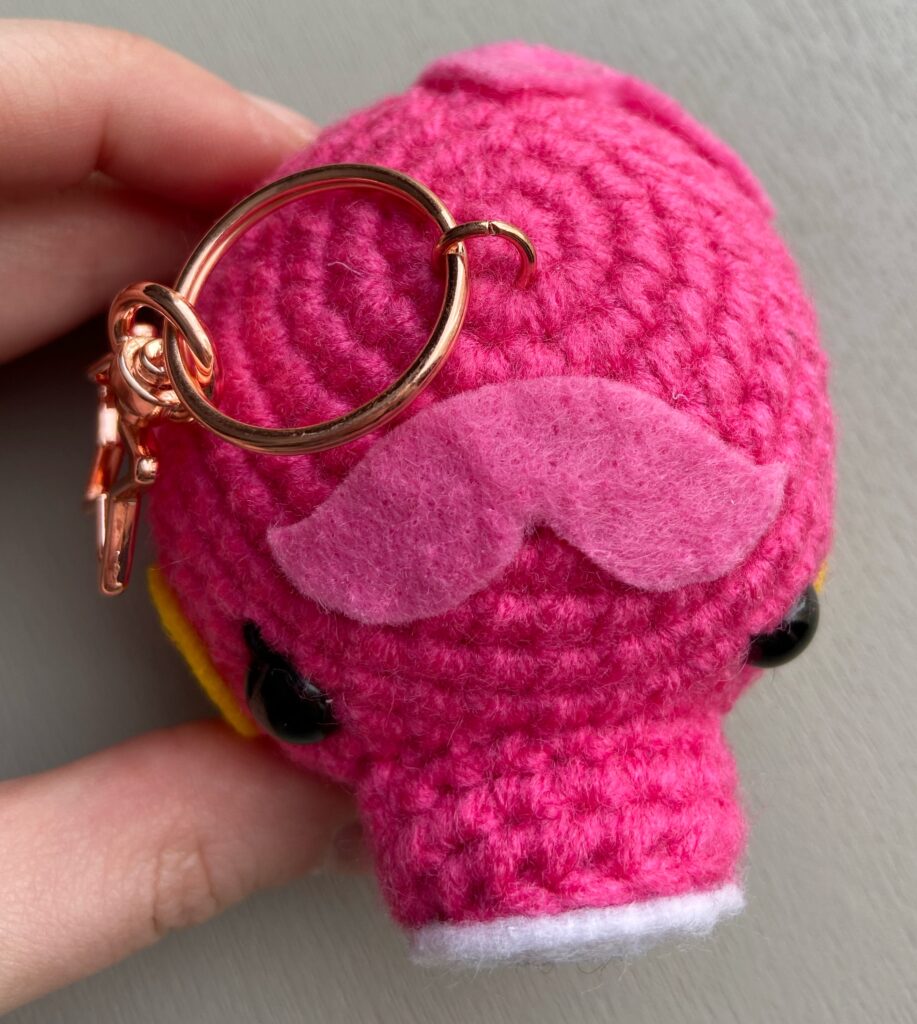
And that is it! You now have a cute Marina keychain of your very own! I hope you enjoyed this pattern. If you have any questions, please feel free to contact me and I will do my best to reply as soon as I can.
I hope you have a wonderful rest of your day. 🙂
~Tori
This is an original pattern by Toristory Creations. Please do not claim this pattern or any part of it as your own. If you plan on selling the amigurumi made from this pattern, please mention Toristory Creations as the pattern designer. You may place a link directing to this pattern on your own website, but please do not repost or republish any part of this pattern on your site. As always, I love to see finished creations made by my patterns, so please share your own versions of this pattern with me @toristorycreations


Oh my goodness so cute and alot of precision & patience!
Amazing the result is precious thank you so much!!! 😀