

Hello, summer! One of my favorite parts of summer where I live is the long days full of sunlight! Having the sun out longer keeps my happiness up and gives me more time to enjoy outside in the fresh air. So I thought I would share with you an amigurumi crochet sun pattern! I hope that no matter where you are in the world or what season it is, that this crochet sun can help brighten your day!
Below are some video tutorials (both left and right handed) in case you want to follow a video tutorial for extra guidance with crocheting this sun or just want someone to crochet with! If you’d rather follow a written pattern, keep scrolling down.
Please note that some of the links in this post may be affiliate links. This means that I may receive a small commission on purchases made through these links at absolutely no cost to you. Thank you for supporting me and Toristory Creations! Your support enables me to continue creating new content!
Materials
- Crochet hook, 3.25mm
- Scissors
- Yarn needle
- 9mm Safety Eyes (you can also use black felt if you don’t have safety eyes)
- Fiber Fill/Stuffing
- Yarn (in colors yellow and orange)
Optional Materials
- Stitch marker – I won’t be mentioning this in my pattern, but I rely on stitch markers to keep track of my stitch count and the start of my rows when I am crocheting.
- Pins – I use pins to help visualize where pieces should go and help keep the pieces in the right location while sewing. While I highly recommend them and will be mentioning them in the pattern, they are not necessary.
- Pink Felt & Glue Gun w/ Glue – This is only needed if you want to add extra details to your sun like blushies.
Pattern Abbreviations
- sc – single crochet
- inc – increase
- dec – decrease
- […] x # – follow the steps inside the square brackets # amount of times, then move onto the next step
Sun Body
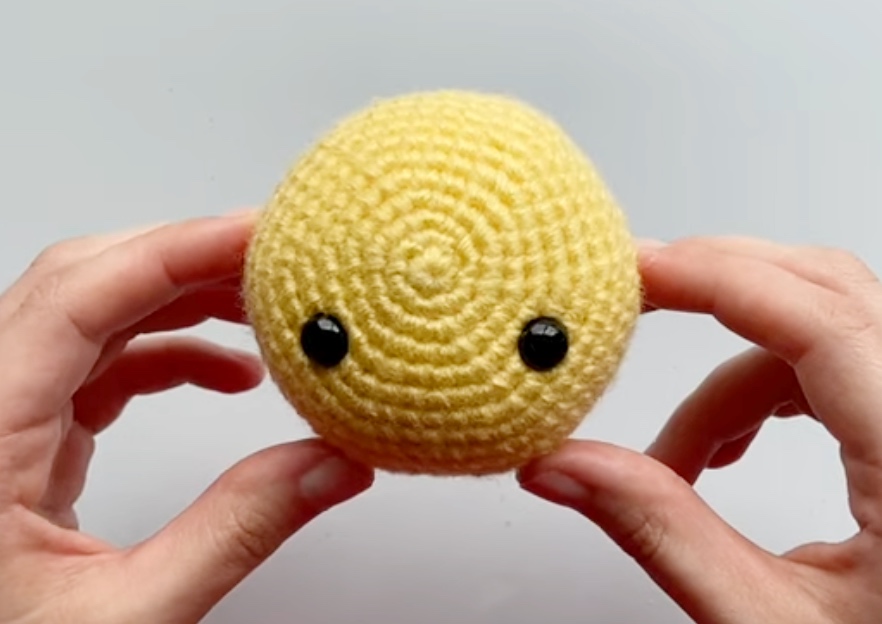
(Using yellow yarn.)
Row 1. magic circle with 6 sc (6)
Row 2. inc x 6 (12)
Row 3. [sc, inc] x 6 (18)
Row 4. [sc x 2, inc] x 6 (24)
Row 5. [sc x 3, inc] x 6 (30)
Row 6. [sc x 4, inc] x 6 (36)
Row 7. [sc x 5, inc] x 6 (42)
Row 8. [sc x 6, inc] x 6 (48)
Row 9. [sc x 7, inc] x 6 (54)
Pause here. Now it is time to insert our safety eyes! I placed my eyes between rows 6 and 7 about 11 stitches apart. Once your eyes are placed where you like them, secure the backings and then continue crocheting!
Row 10-13. sc x 54 (54)
Row 14. [sc x 7, dec] x 6 (48)
Row 15. [sc x 6, dec] x 6 (42)
Row 16. [sc x 5, dec] x 6 (36)
Row 17. [sc x 4, dec] x 6 (30)
Row 18. [sc x 3, dec] x 6 (24)
Row 19. [sc x 2, dec] x 6 (18)
Pause here to firmly stuff the sun using fiber fill, then continue crocheting.
Row 20. [sc, dec] x 6 (12)
Row 21. dec x 6 (6)
Fasten off and hide loose ends.
Sun Rays (make 8 of these)
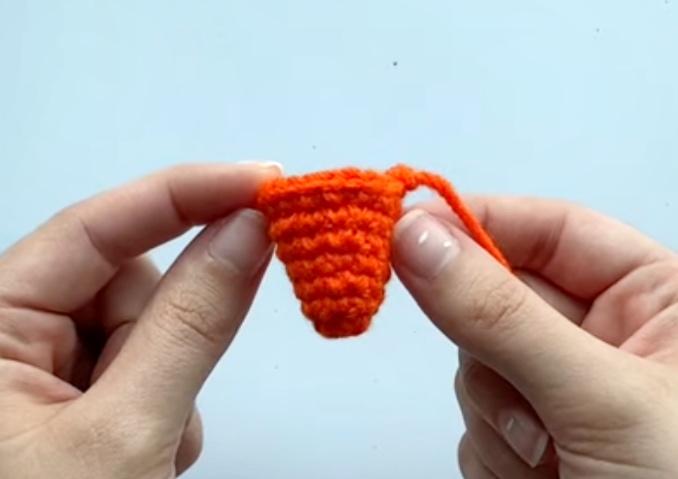
(Using orange yarn.)
Row 1. magic circle with 8 sc (8)
Row 2. sc x 8 (8)
Row 3. [sc, inc] x 4 (12)
Row 4. sc x 12 (12)
Row 5. [sc x 2, inc] x 4 (16)
Row 6. sc x 16 (16)
Row 7. [sc x 3, inc] x 4 (20)
Fasten off and leave a long tail for sewing onto the body.
Putting the Pieces Together
Before I start sewing my amigurumi sun together, I first use pins to place each piece where I think it should go. I remove the pins from my amigurumi as I sew. I placed the sun rays on the sides of the sun, placed evenly around the sun as seen in the below photo.
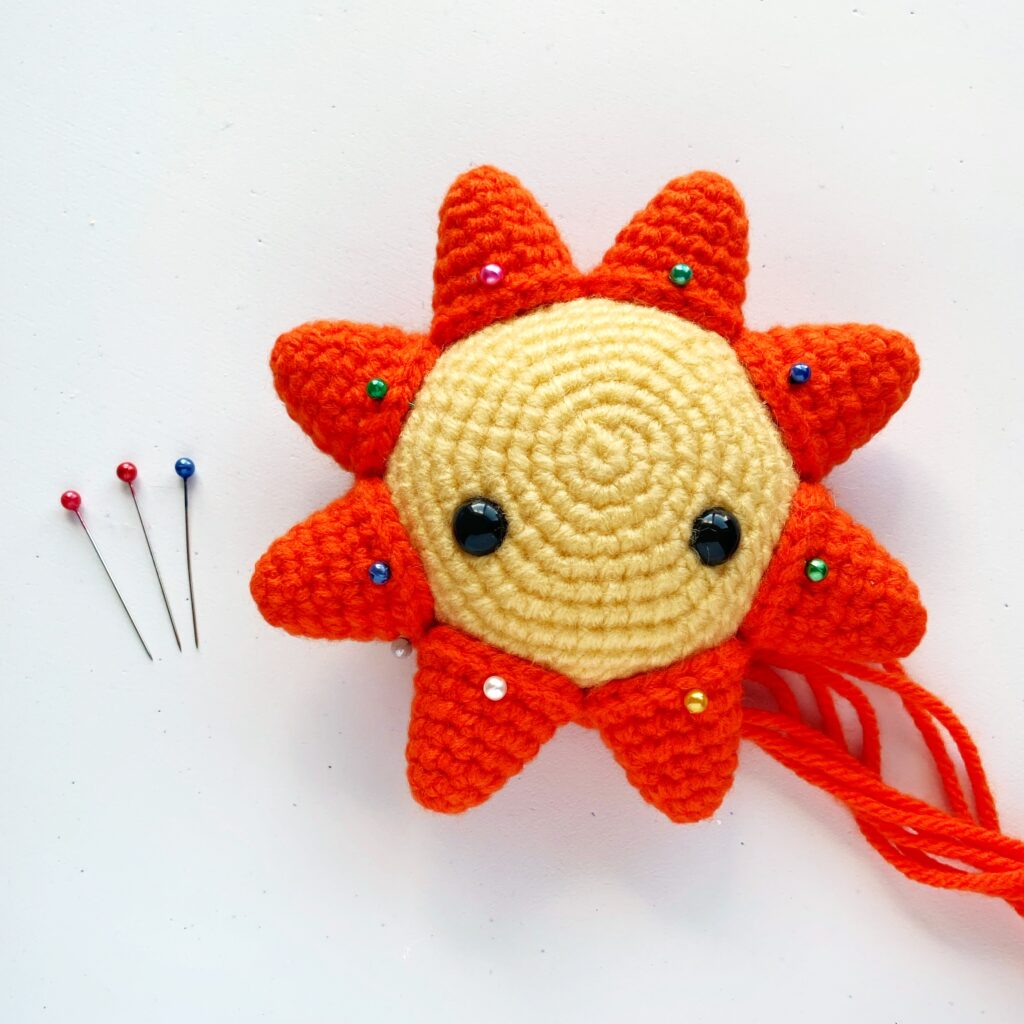
Once you are comfortable with the placement of the sun’s rays, use your yarn needle to sew the rays onto the sun. Once you’ve completed sewing the pieces together, your amigurumi sun should look like this:
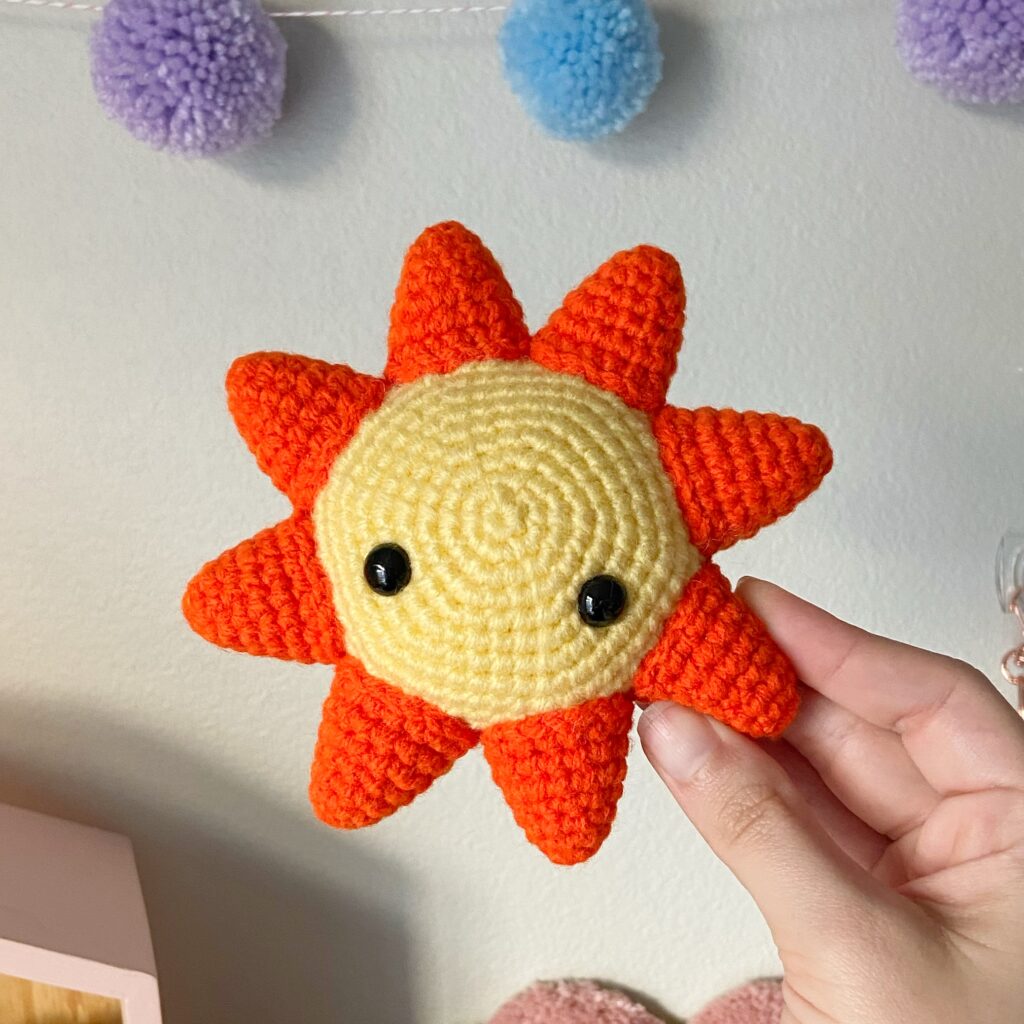
And that is it! You now have a cute crochet sun of your very own! I hope you enjoyed this pattern. If you have any questions, please feel free to contact me and I will do my best to reply as soon as I can.
I hope you have a wonderful rest of your day. 🌸
~Tori
This is an original pattern by Toristory Creations. Please do not claim this pattern or any part of it as your own. If you plan on selling the amigurumi made from this pattern, please mention Toristory Creations as the pattern designer. You may place a link to this pattern on your own website, but please do not repost or republish any part of this pattern on your site. As always, I love to see finished creations made by my patterns, so please share your own versions of this pattern with me @toristorycreations


Love youre stuff, keep up the really good work xoxo -💜🎀🎃🧶
Thank you so much for your support! I really appreciate it!💖 I wish you the best of luck on your crochet journey!